


How to Use Redaction Templates
Most firms redact the same things over and over. A redaction template saves the categories you chose on one document so every document like it starts the same way, already ticked, before you open it. You still review and approve every redaction. The template just means you are not making the same decisions from scratch each time.
What a template does
Saves categories, not text
A template remembers that you redact SSNs and client names on this kind of filing. It does not store anything from the document it was created from.
Remembers partial redaction
If you keep the last four digits of account numbers, the template keeps that too, so FRCP 5.2 filings come out consistent every time.
Nothing happens without you
A template pre-selects. It never confirms. Every redaction still waits for you to review the detections and press Confirm.
Recorded in the audit trail
Each redaction records the template it used, and flags it if you changed the selection afterwards, so the trail says what actually happened.
Before you start
How many templates you can save depends on your plan.
- Free and Starter: one saved template
- Pro, Business and Enterprise: unlimited templates. View plans
Create a template
The easiest moment to make a template is just after you have decided what matters on a document, because you have already done the thinking.
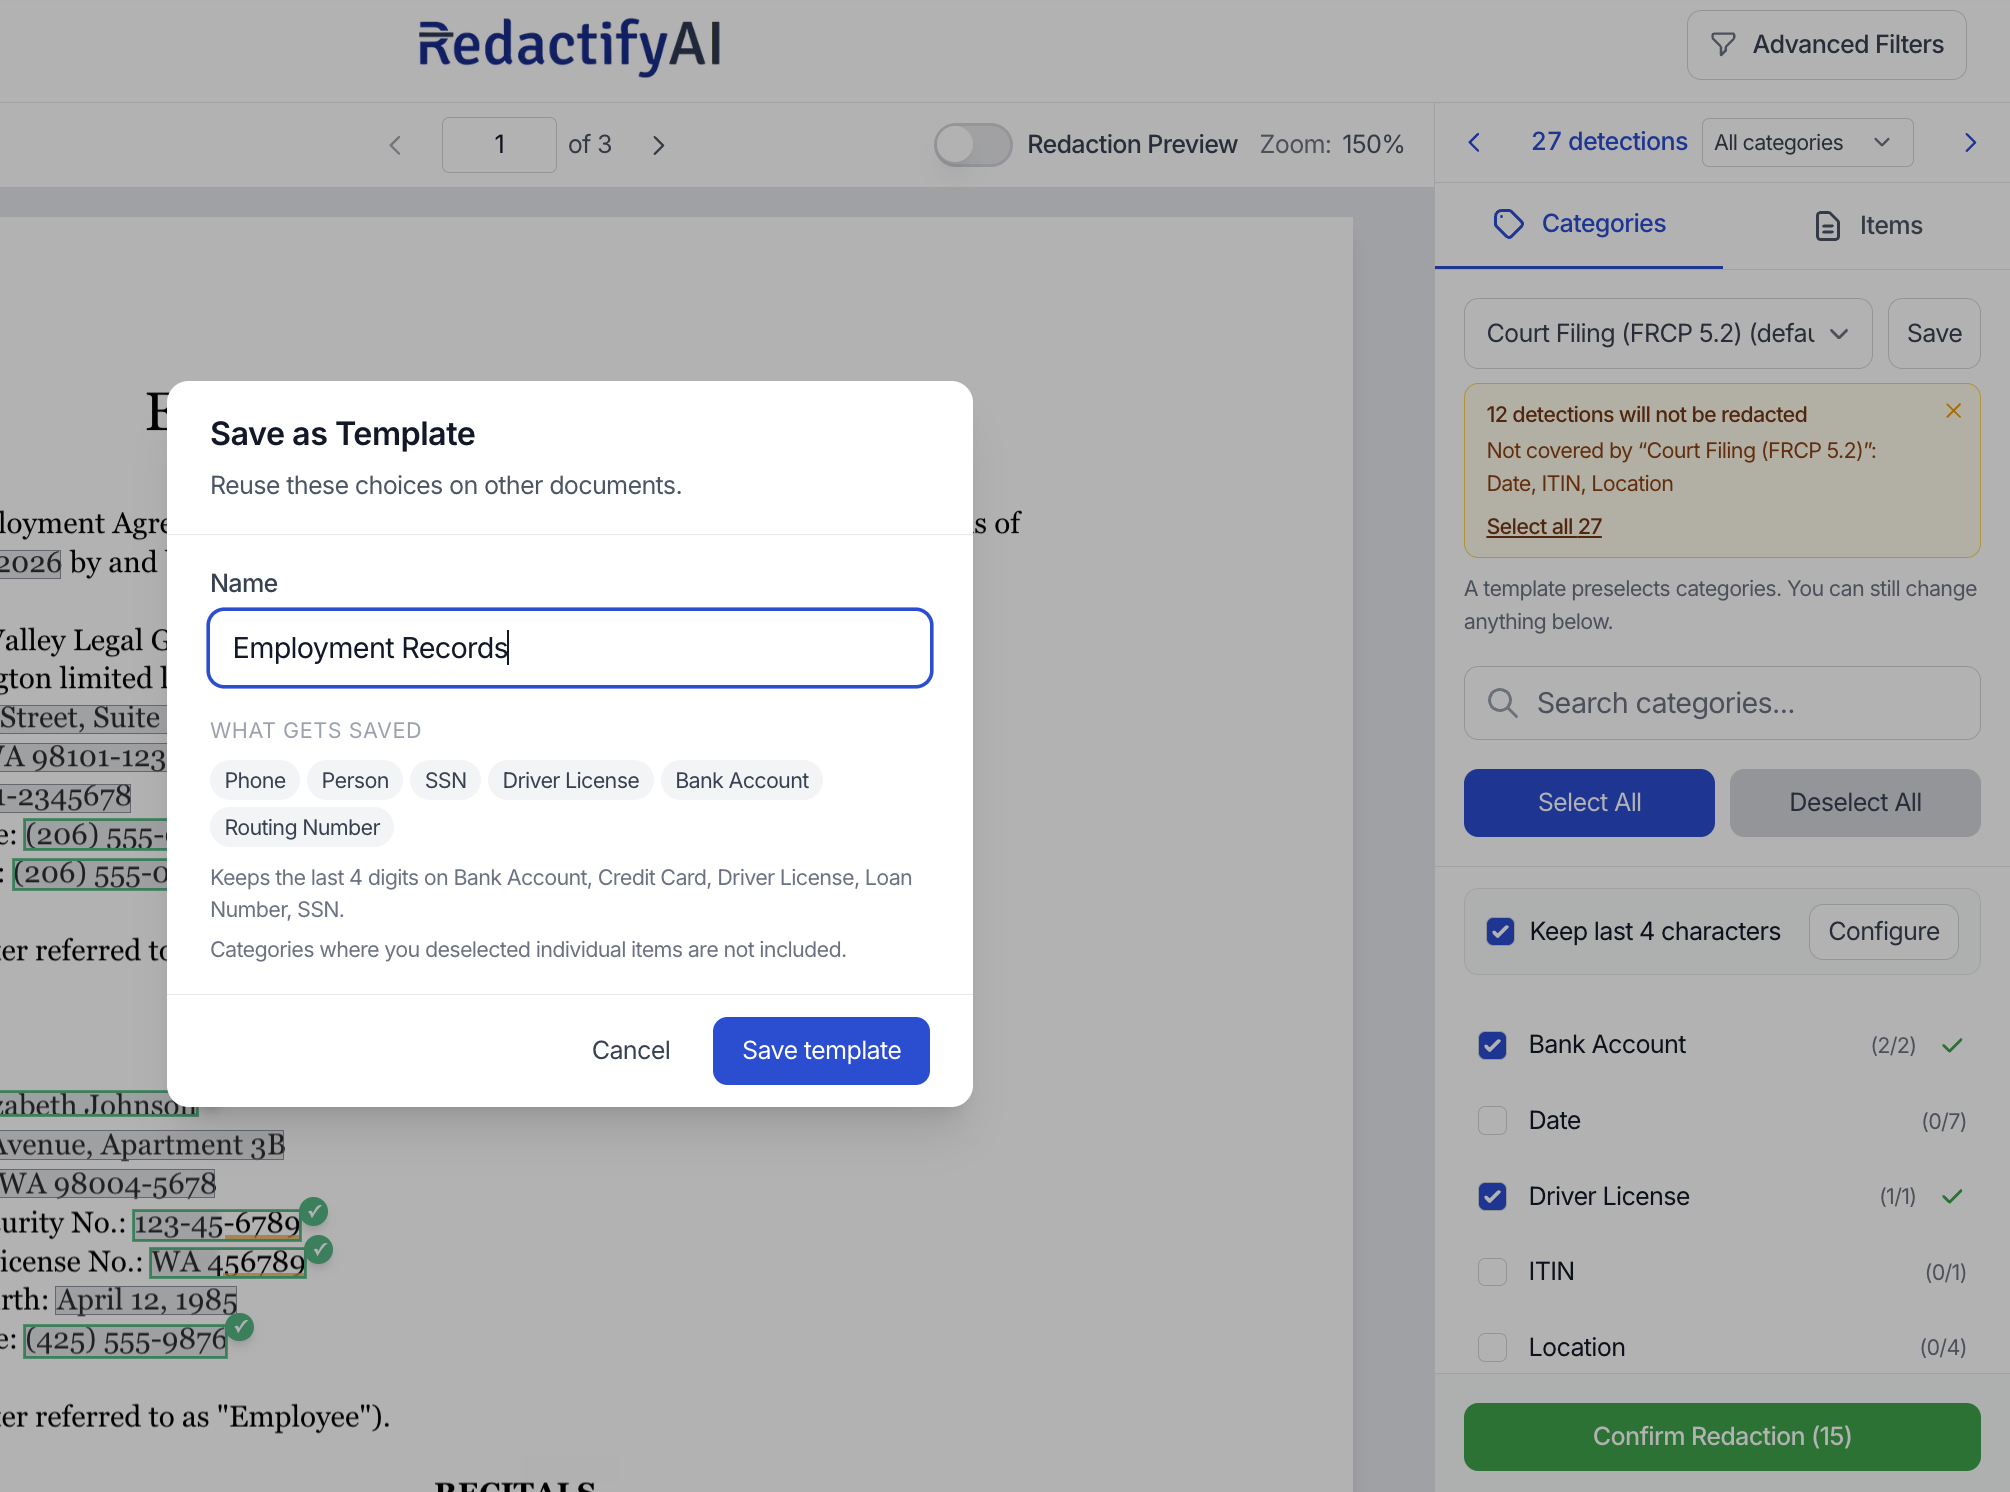
Open a document for review and tick the categories you want redacted. Then click Save beside the template dropdown at the top of the review panel, give it a name, and click Save template.
The dialog lists exactly what is being saved. Categories where you deselected individual items are left out, because a template is a rule for a kind of document, not a record of one.
Save as Template
Apply a template when you upload
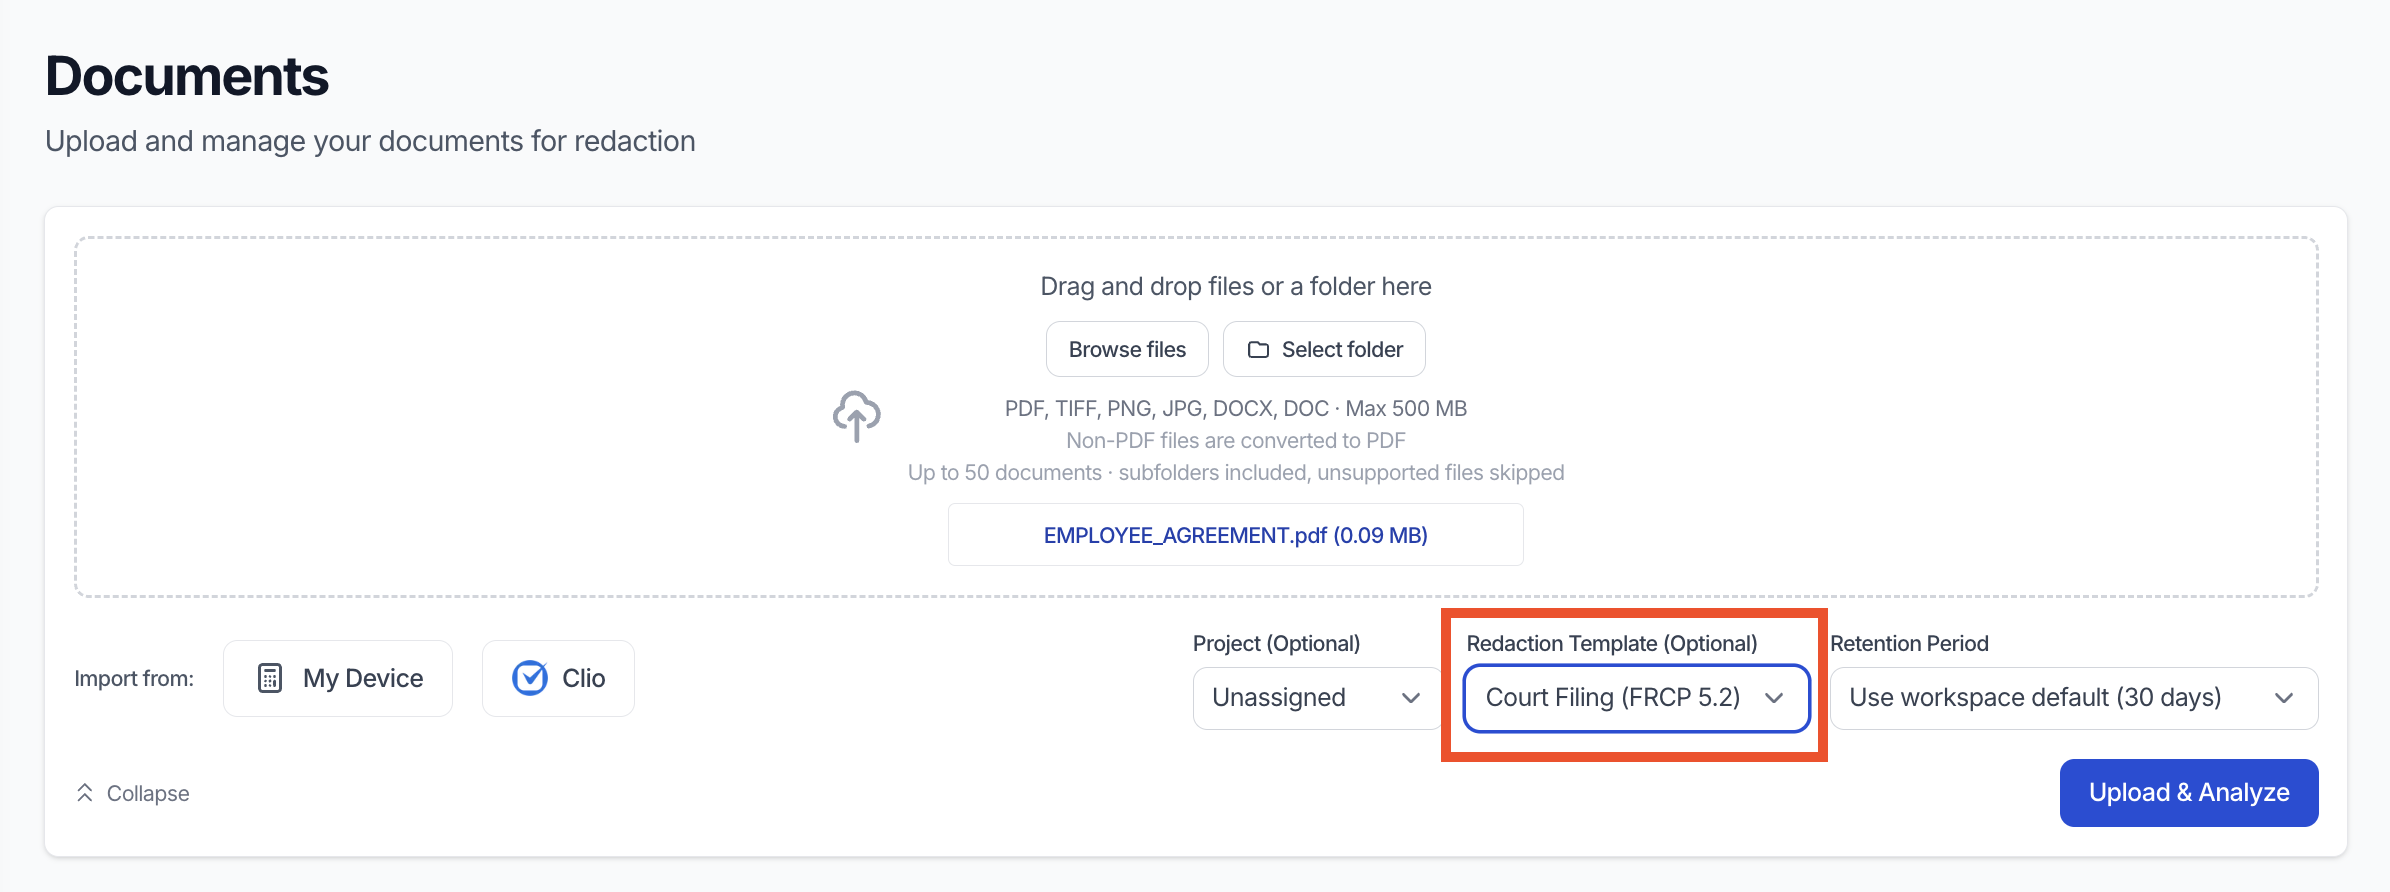
On the Documents page, add your file, then choose a template in the Redaction Template field before clicking Upload & Analyze.
When the document finishes analysing, it opens with the template already applied, so the categories you always redact are ticked and the ones you never redact are not.
Documents page
Apply or change a template while reviewing
You are not stuck with the template you picked at upload. The dropdown at the top of the review panel switches templates at any point, and None — review everything detected clears it and selects every detection instead.
Below it, the amber notice is the important part. It tells you which detected categories the template does not cover, so you can see what will be left in the document before you confirm. In the example below the template covers most of the agreement but leaves dates, an ITIN and addresses unredacted.
If that is what you want, carry on. If it is not, tick the missing categories or click Select all. The notice gets louder, never quieter, as more of the document goes unredacted.
Review panel with a template applied
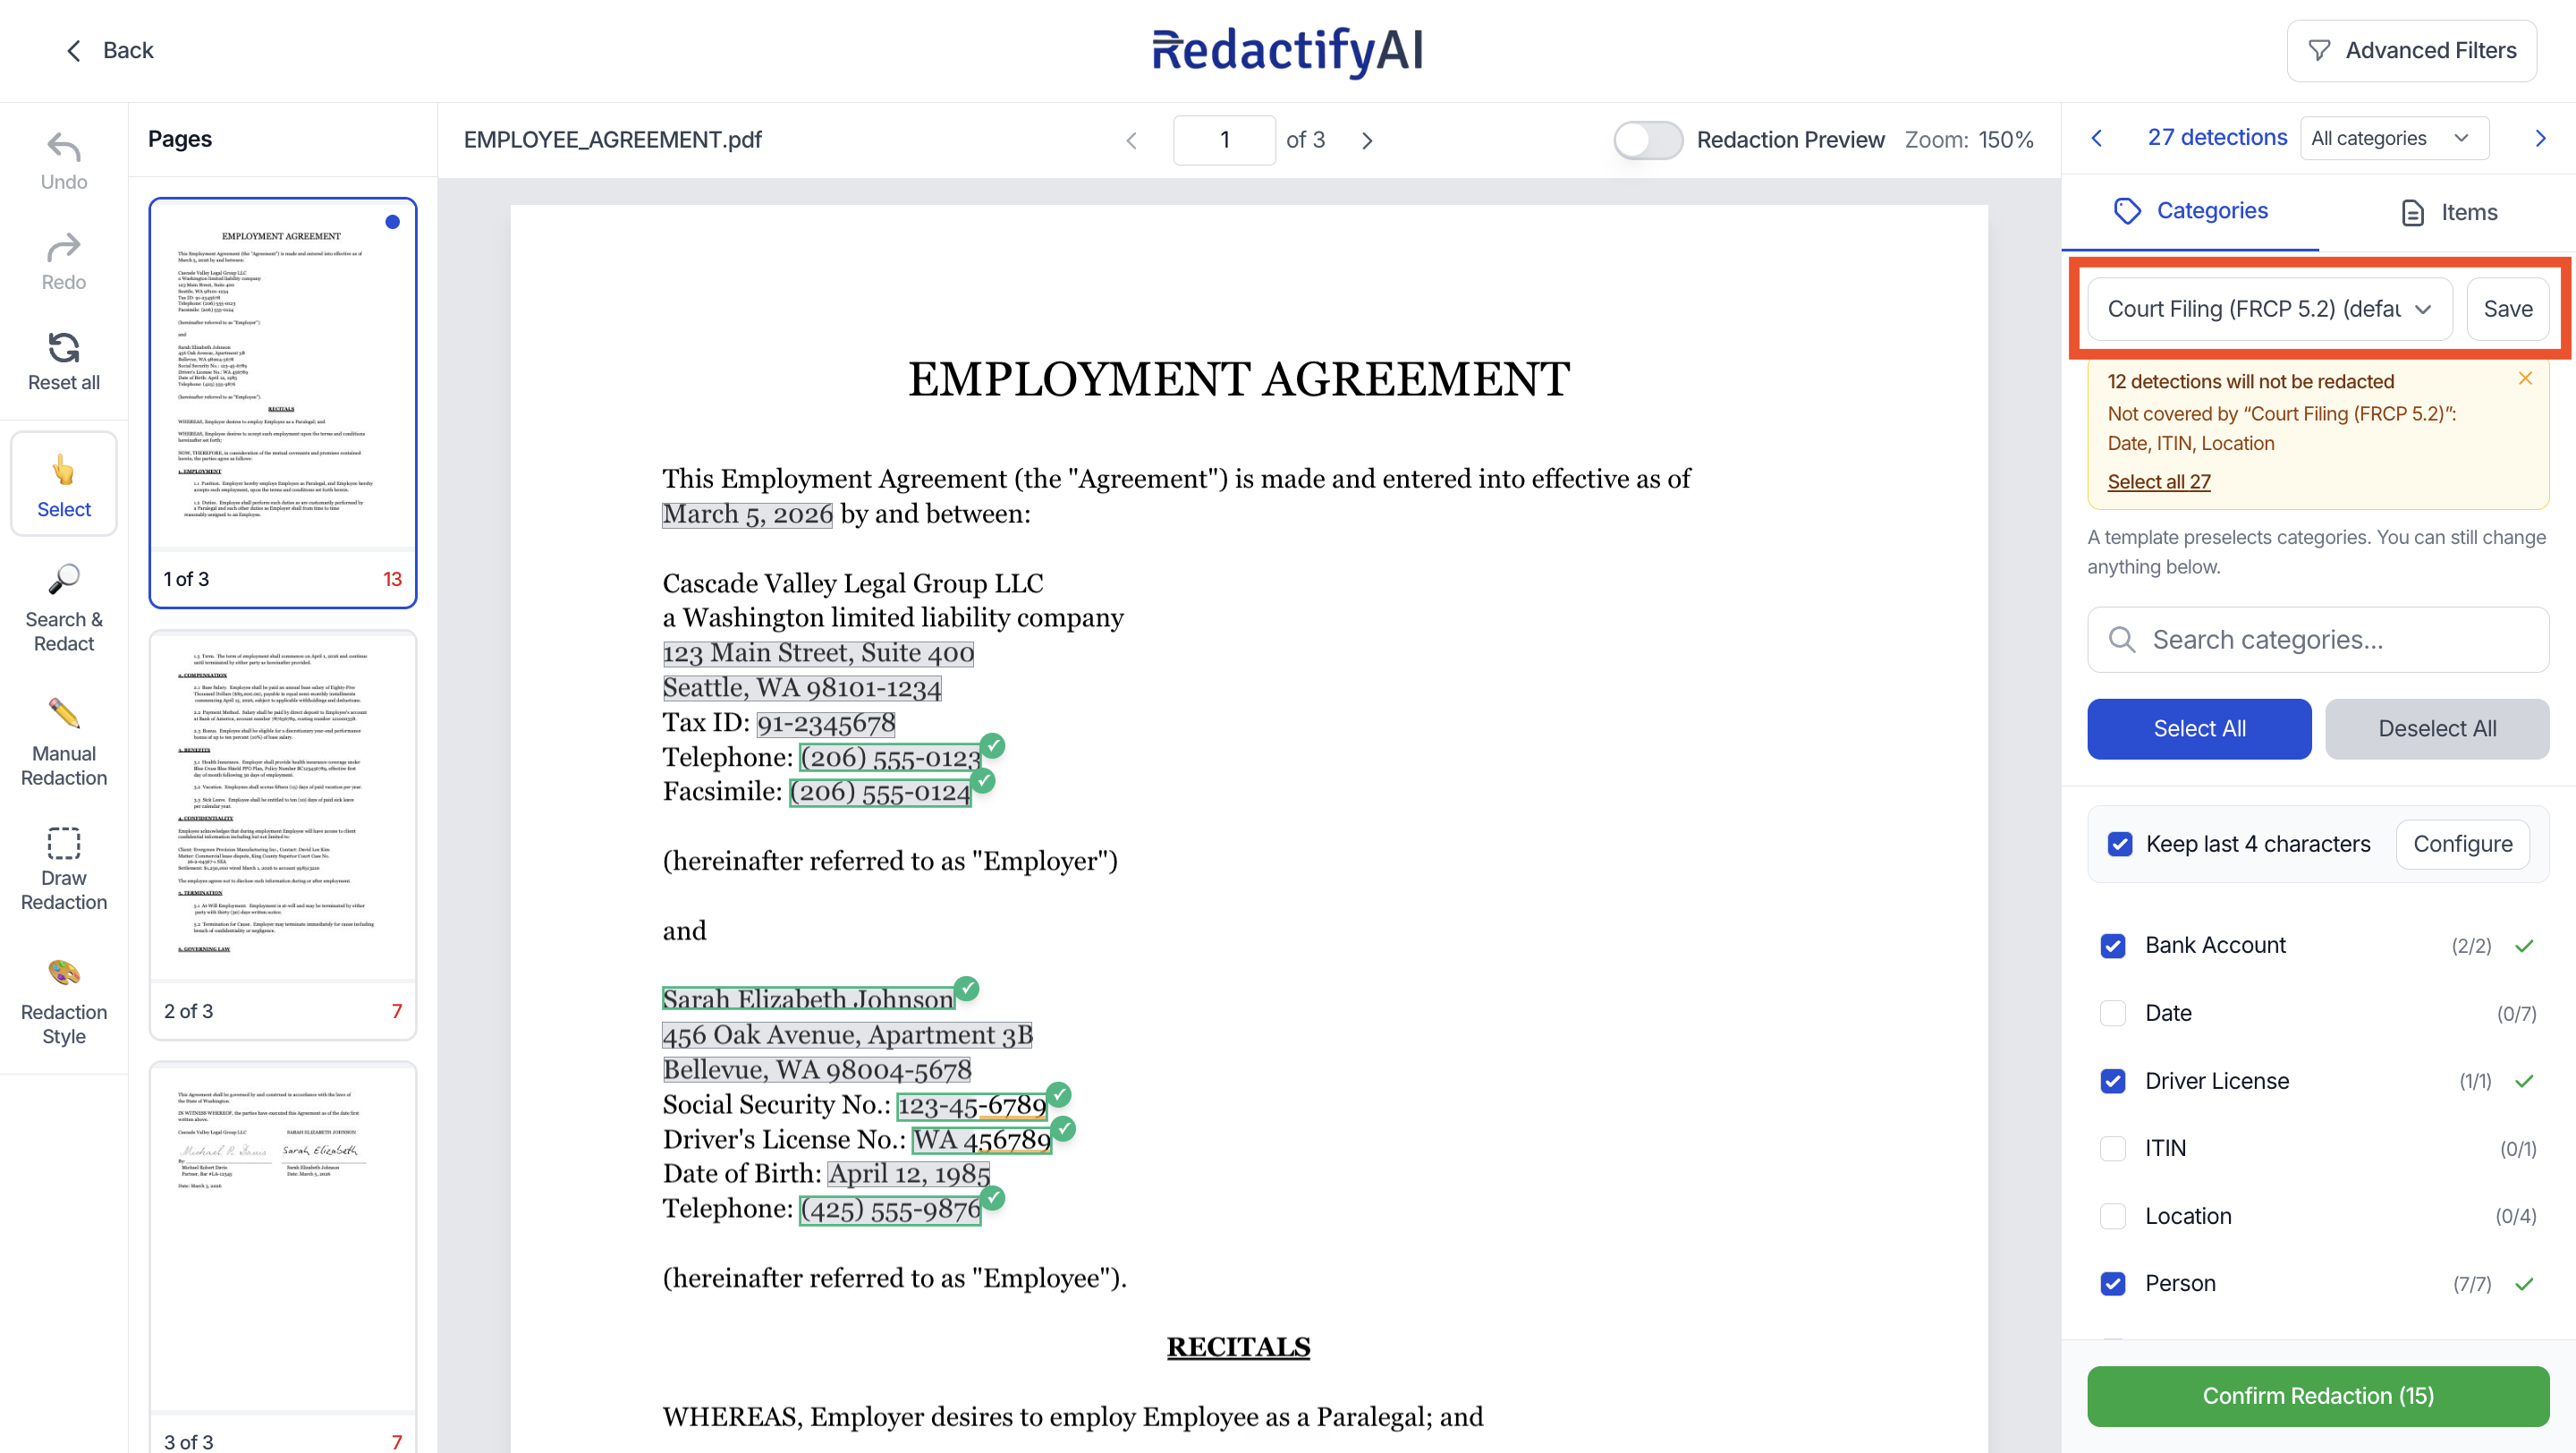
If you change the selection after applying, the dropdown adds (modified) beside the name. That is a reminder, not a problem, and the audit record notes it too.
Set a workspace default
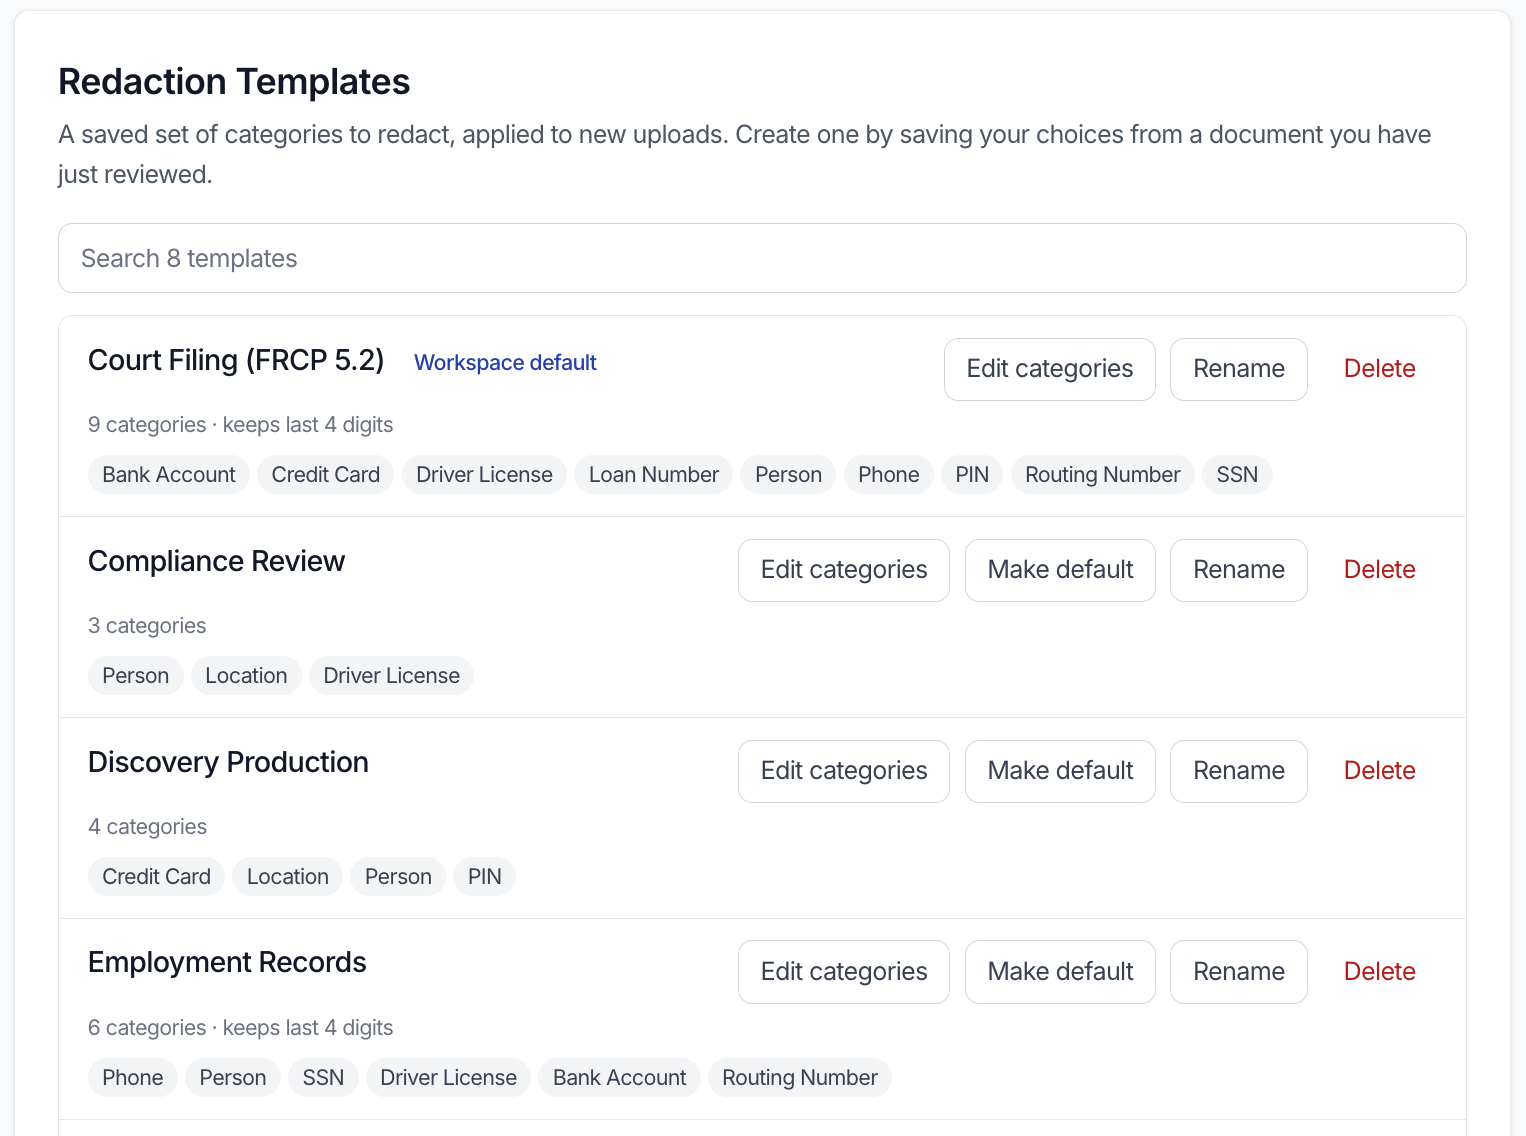
If your firm redacts most documents the same way, make that template the default. Go to Settings, find Redaction Templates, and click Make default on the one you want.
Every new upload then starts with it applied, and anyone in the workspace can still choose a different one for a particular document. This is also where you rename a template, edit its categories, or delete it.
Settings → Redaction Templates
Use a template across a batch
Templates are most useful on a stack of documents rather than one. Add all your files first, then choose the template, then click Upload & Analyze. Every document in the batch arrives with the same categories selected.
Work through them with Confirm & Next, which takes you to the following document without going back to the list. Each document keeps its own decisions, so unticking something on one does not change the others.
If a document turns out to need nothing redacting, use Nothing to redact where the Confirm button sits. That records your decision and moves you on, rather than leaving the document waiting.
A few things worth knowing
Editing a template does not change past redactions
Documents you have already redacted keep the categories that were actually applied to them. A template edit only affects documents you redact from then on.
A template is a starting point, not a guarantee
It selects categories the detector found. Read the amber notice, and review the document before confirming. Redaction is permanent.
Still have a question?
If something here does not match what you are seeing, or you want a hand setting templates up for your firm, get in touch.