


How to Connect RedactifyAI to Clio Manage
This guide walks you through connecting your RedactifyAI account to Clio Manage, importing documents from your matters, and running AI-powered redaction. When redaction is complete, the redacted file automatically syncs back to the same folder in your Clio matter as a new file. Your originals are never overwritten.
Video walkthrough
Watch a full demo of the RedactifyAI workflow, including the Clio integration.
Why connect Clio to RedactifyAI?
Originals stay untouched
Redacted documents are saved as new files in your Clio matter. Your original is never modified. Courts can order in-camera review; your unredacted file is always there.
Redaction is permanent
Sensitive data is removed from the file itself, not hidden behind a box. There is nothing to copy, recover, or accidentally share.
Full audit trail
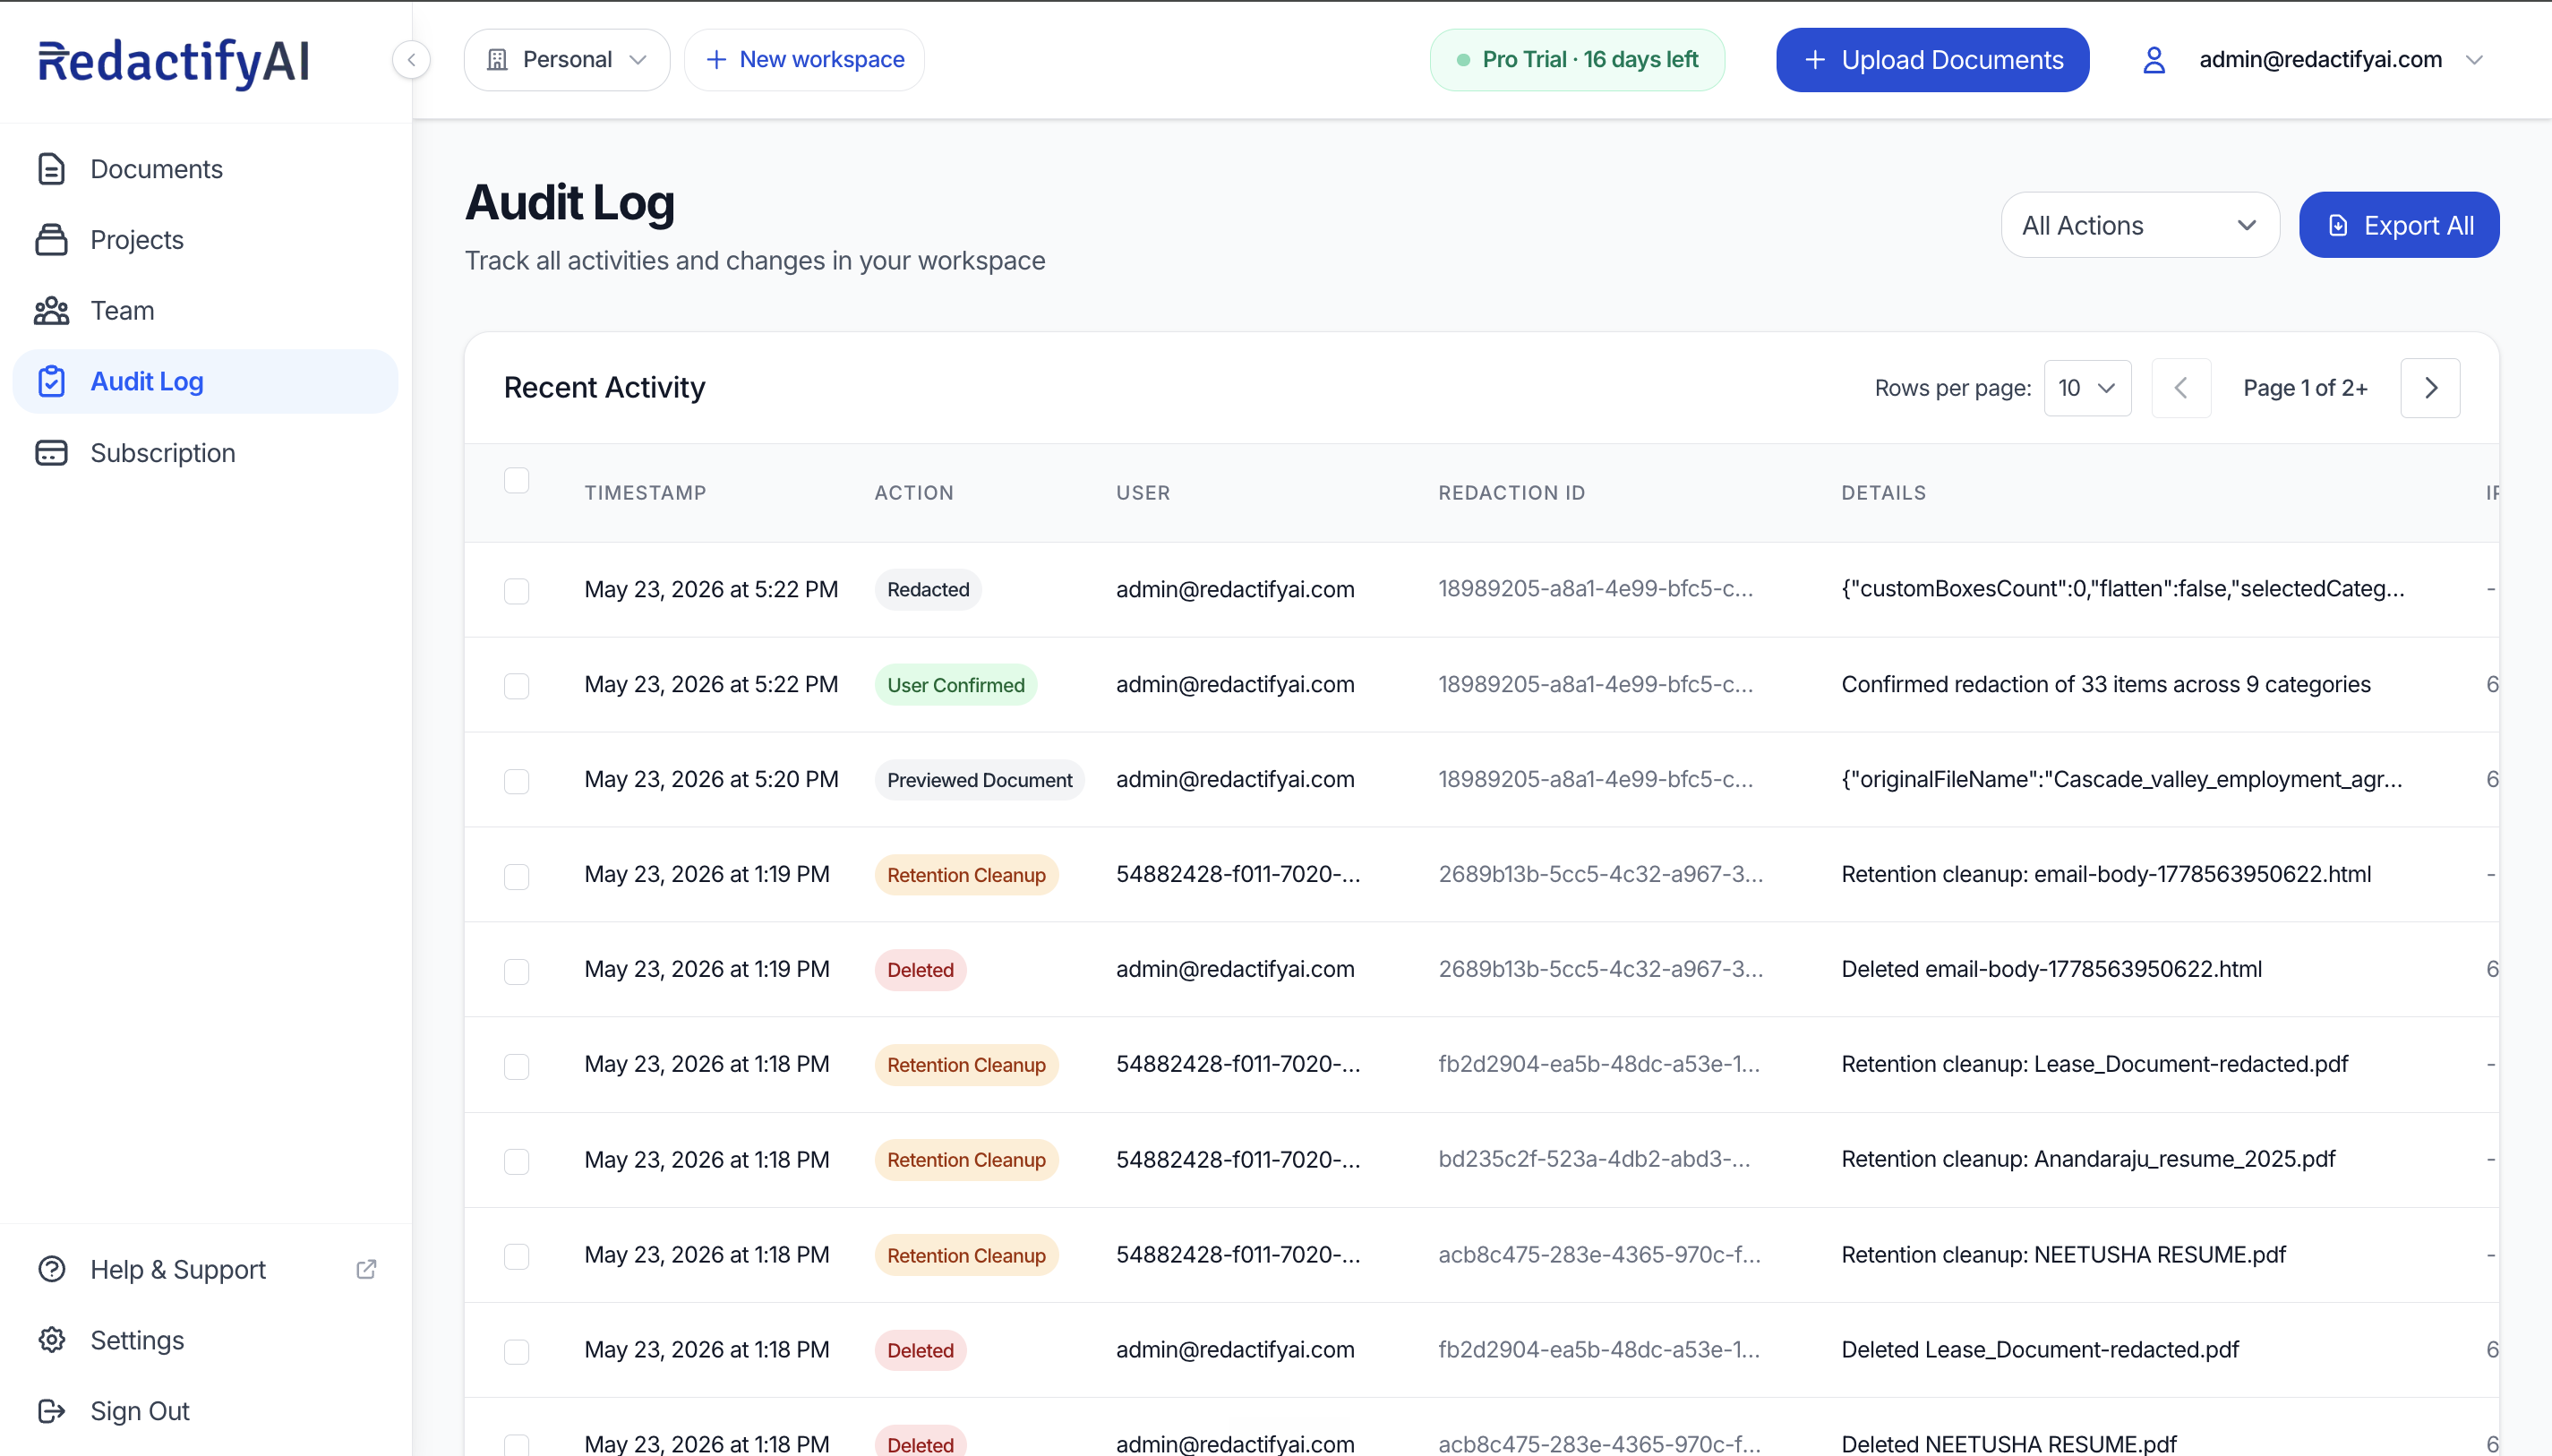
Every redaction action is logged: who redacted, what was removed, and when. Exportable for compliance reviews or bar association records requests.
No context switching
Import directly from any Clio matter and folder. When you are done, the redacted file appears in Clio without any downloading, renaming, or re-uploading on your end.
Before you start
Make sure you have both of these before following the steps below.
- An active Clio Manage account
- A RedactifyAI account on the Starter plan or higher. The Clio integration is not available on the Free plan. View plans
Connect RedactifyAI to Clio
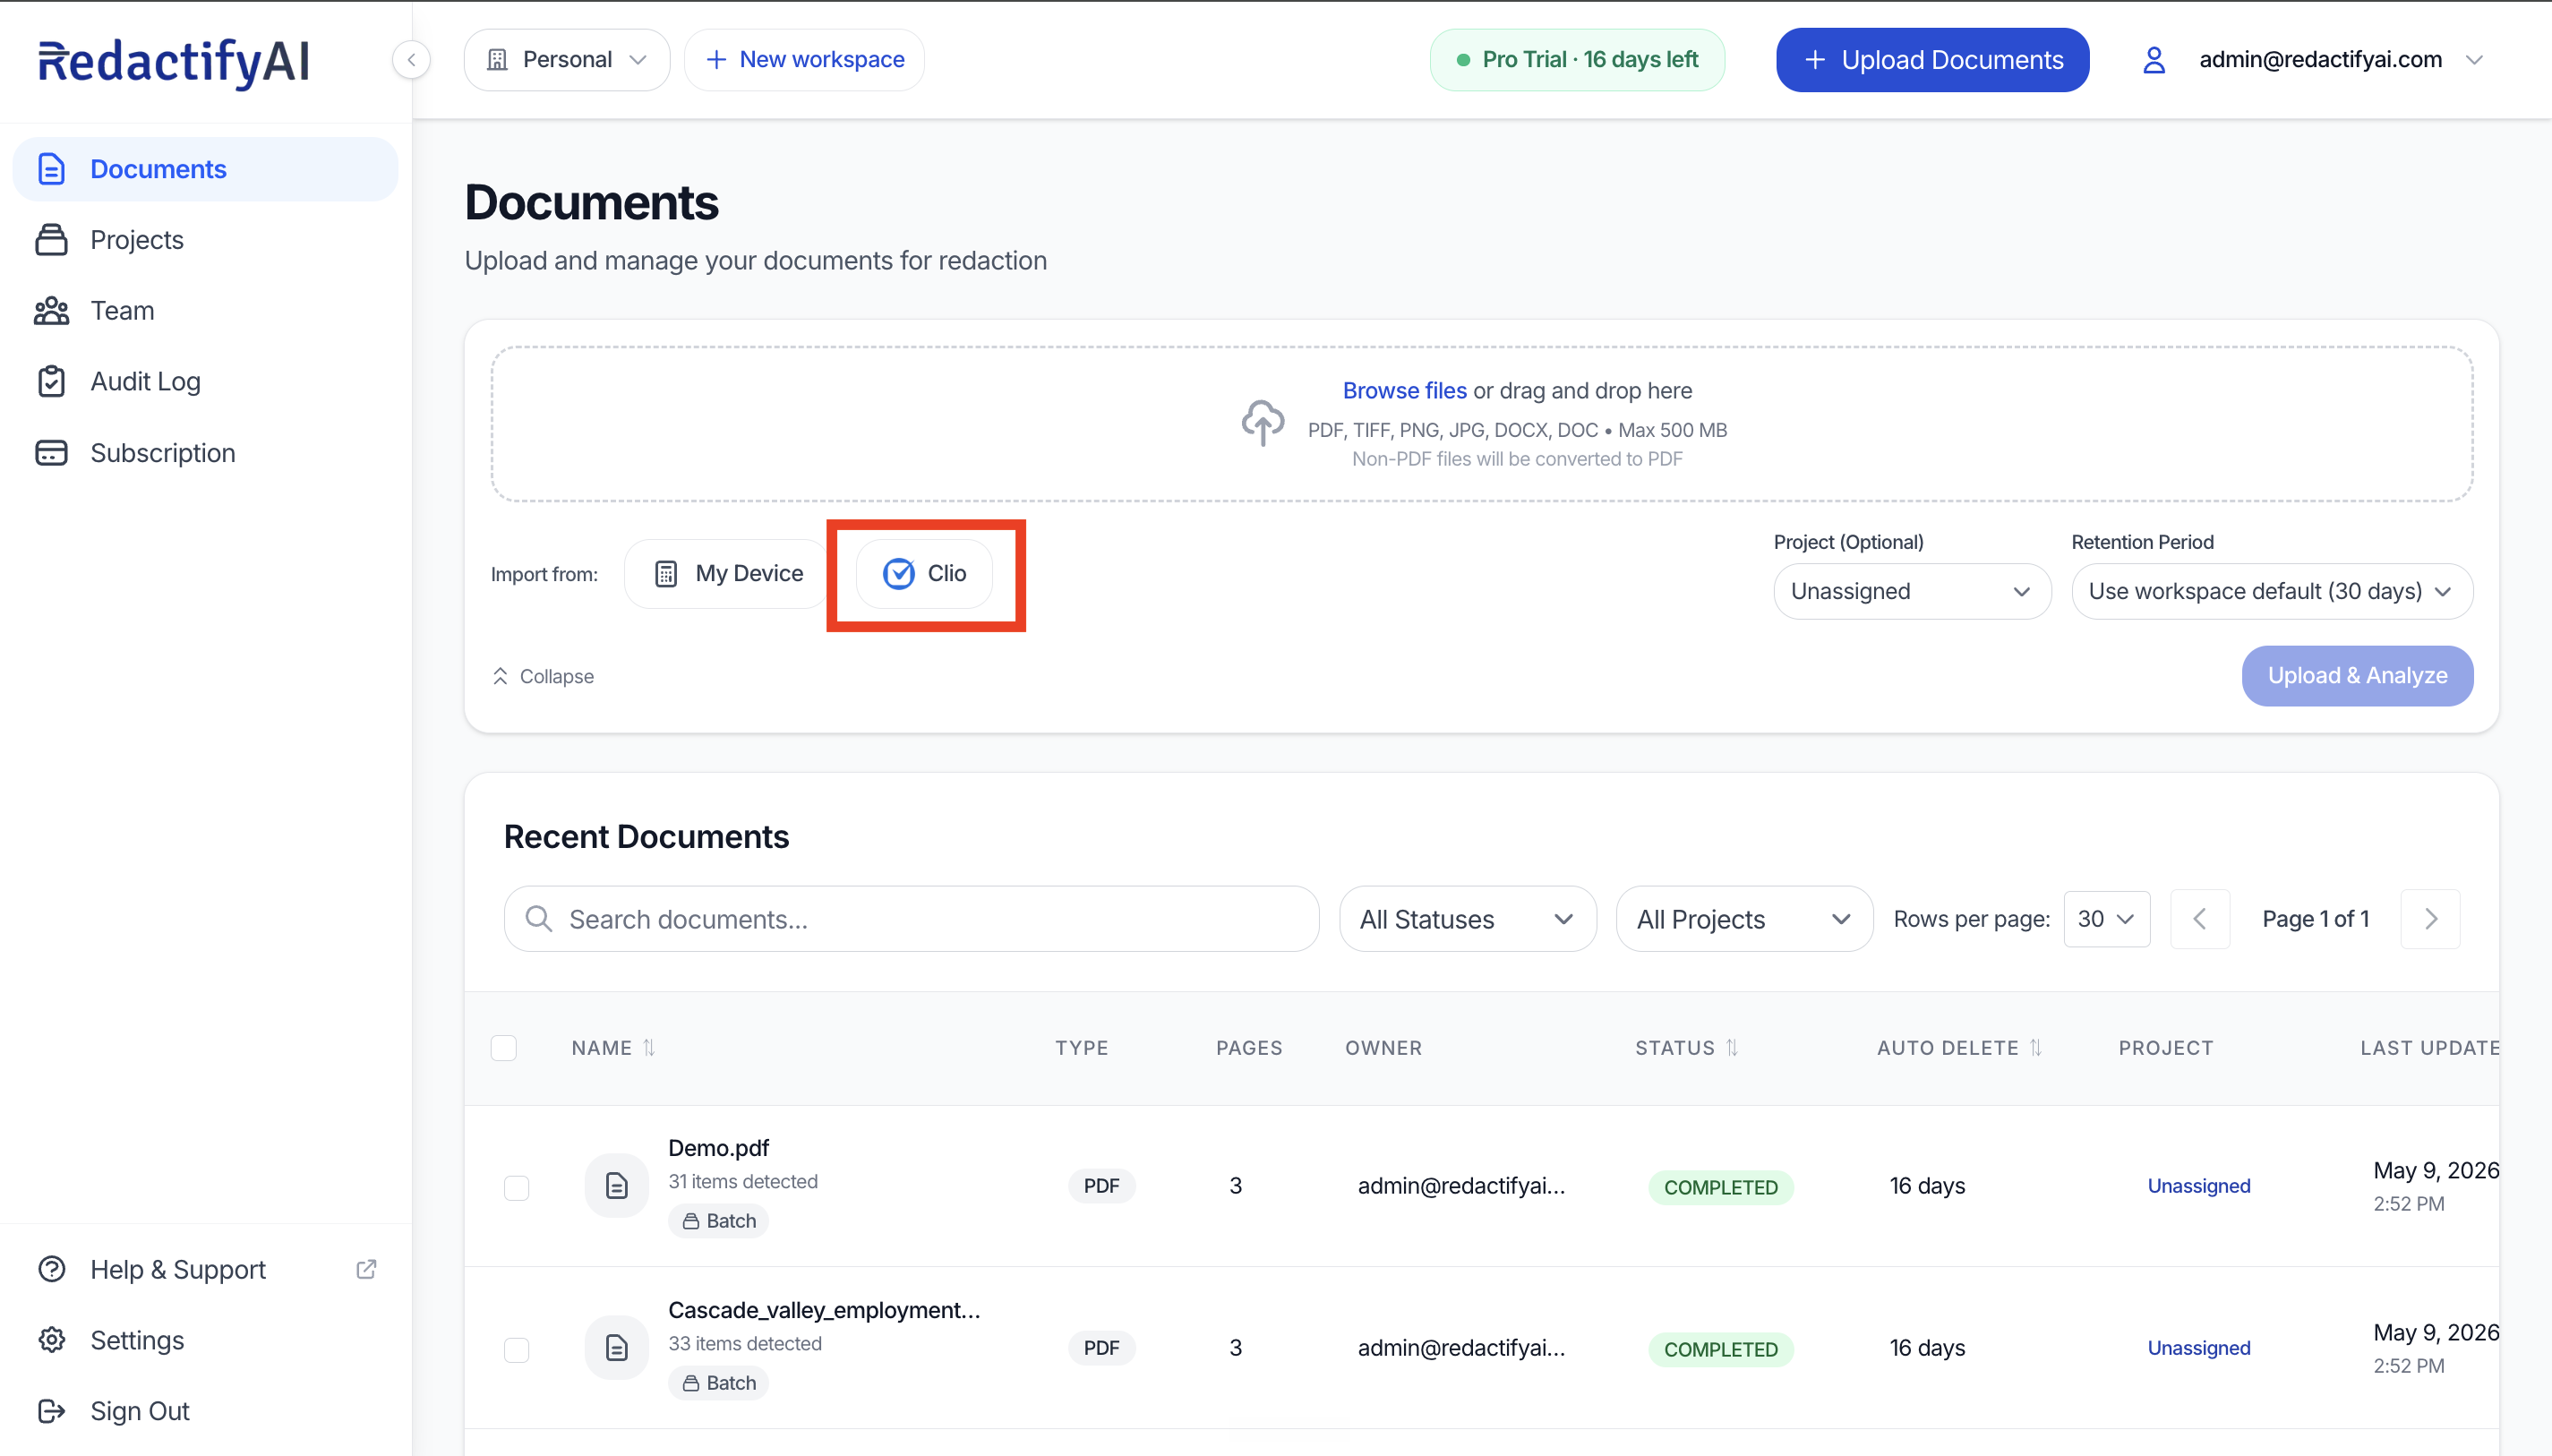
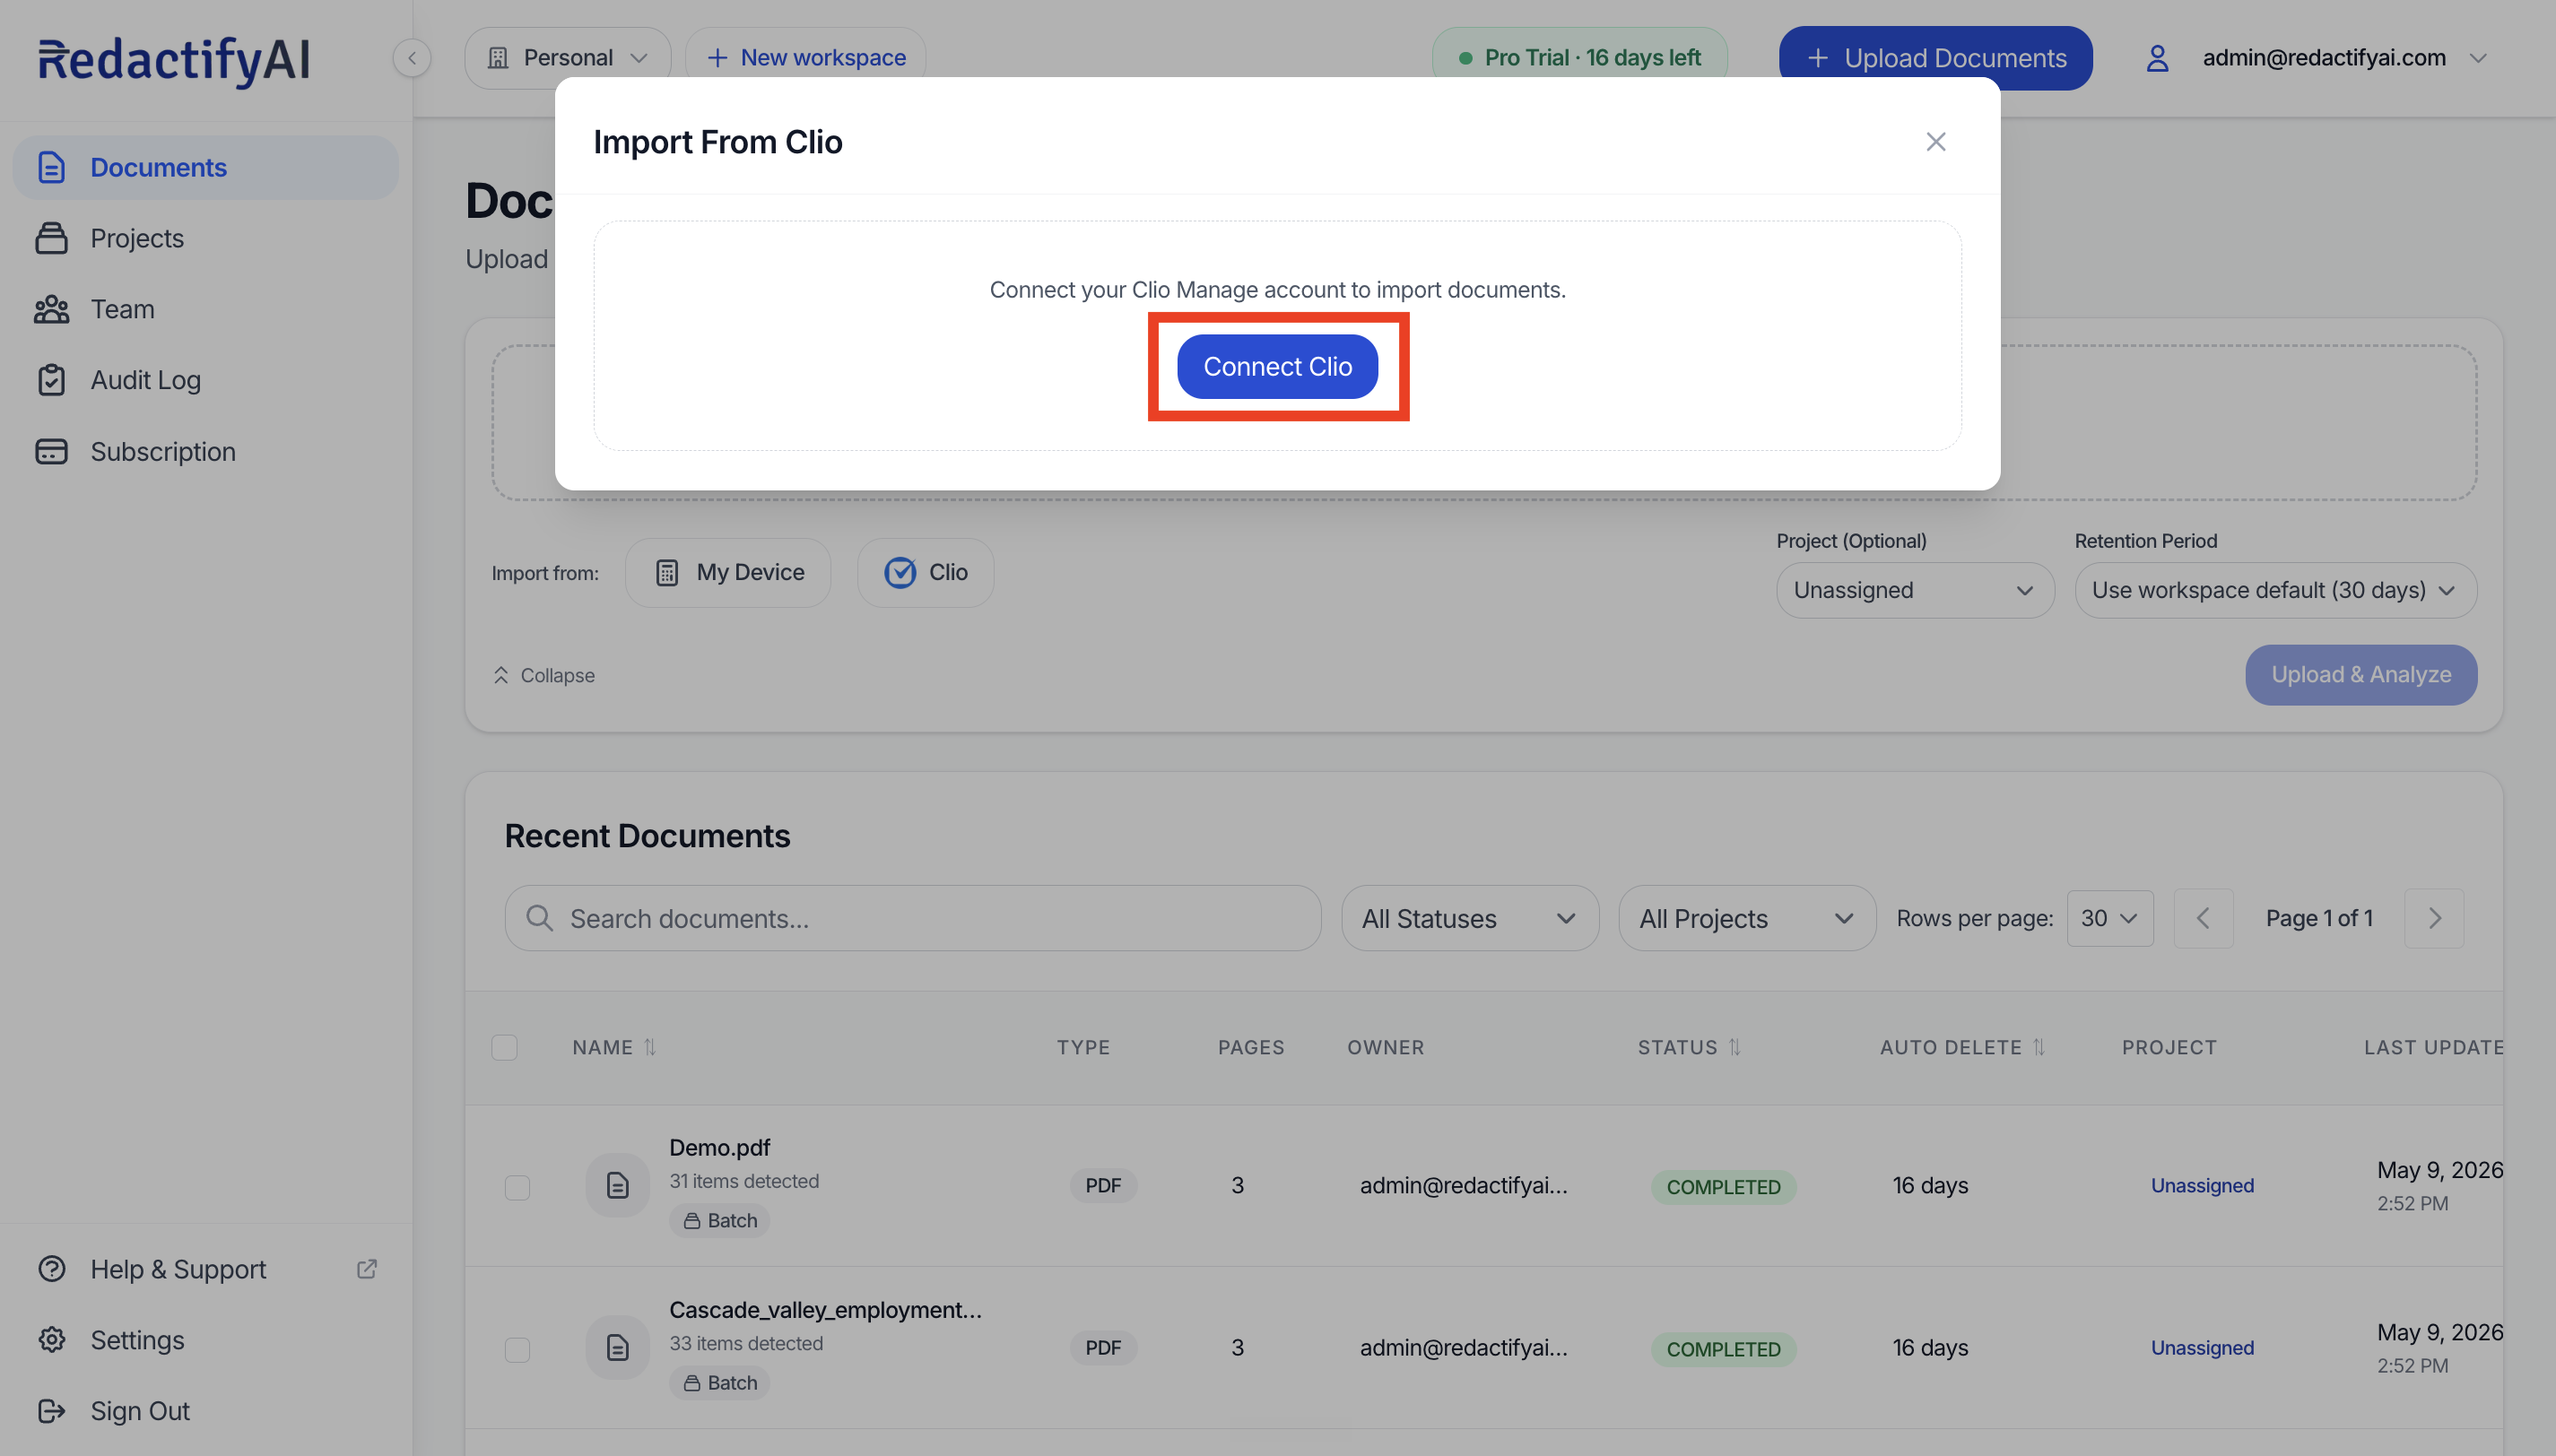
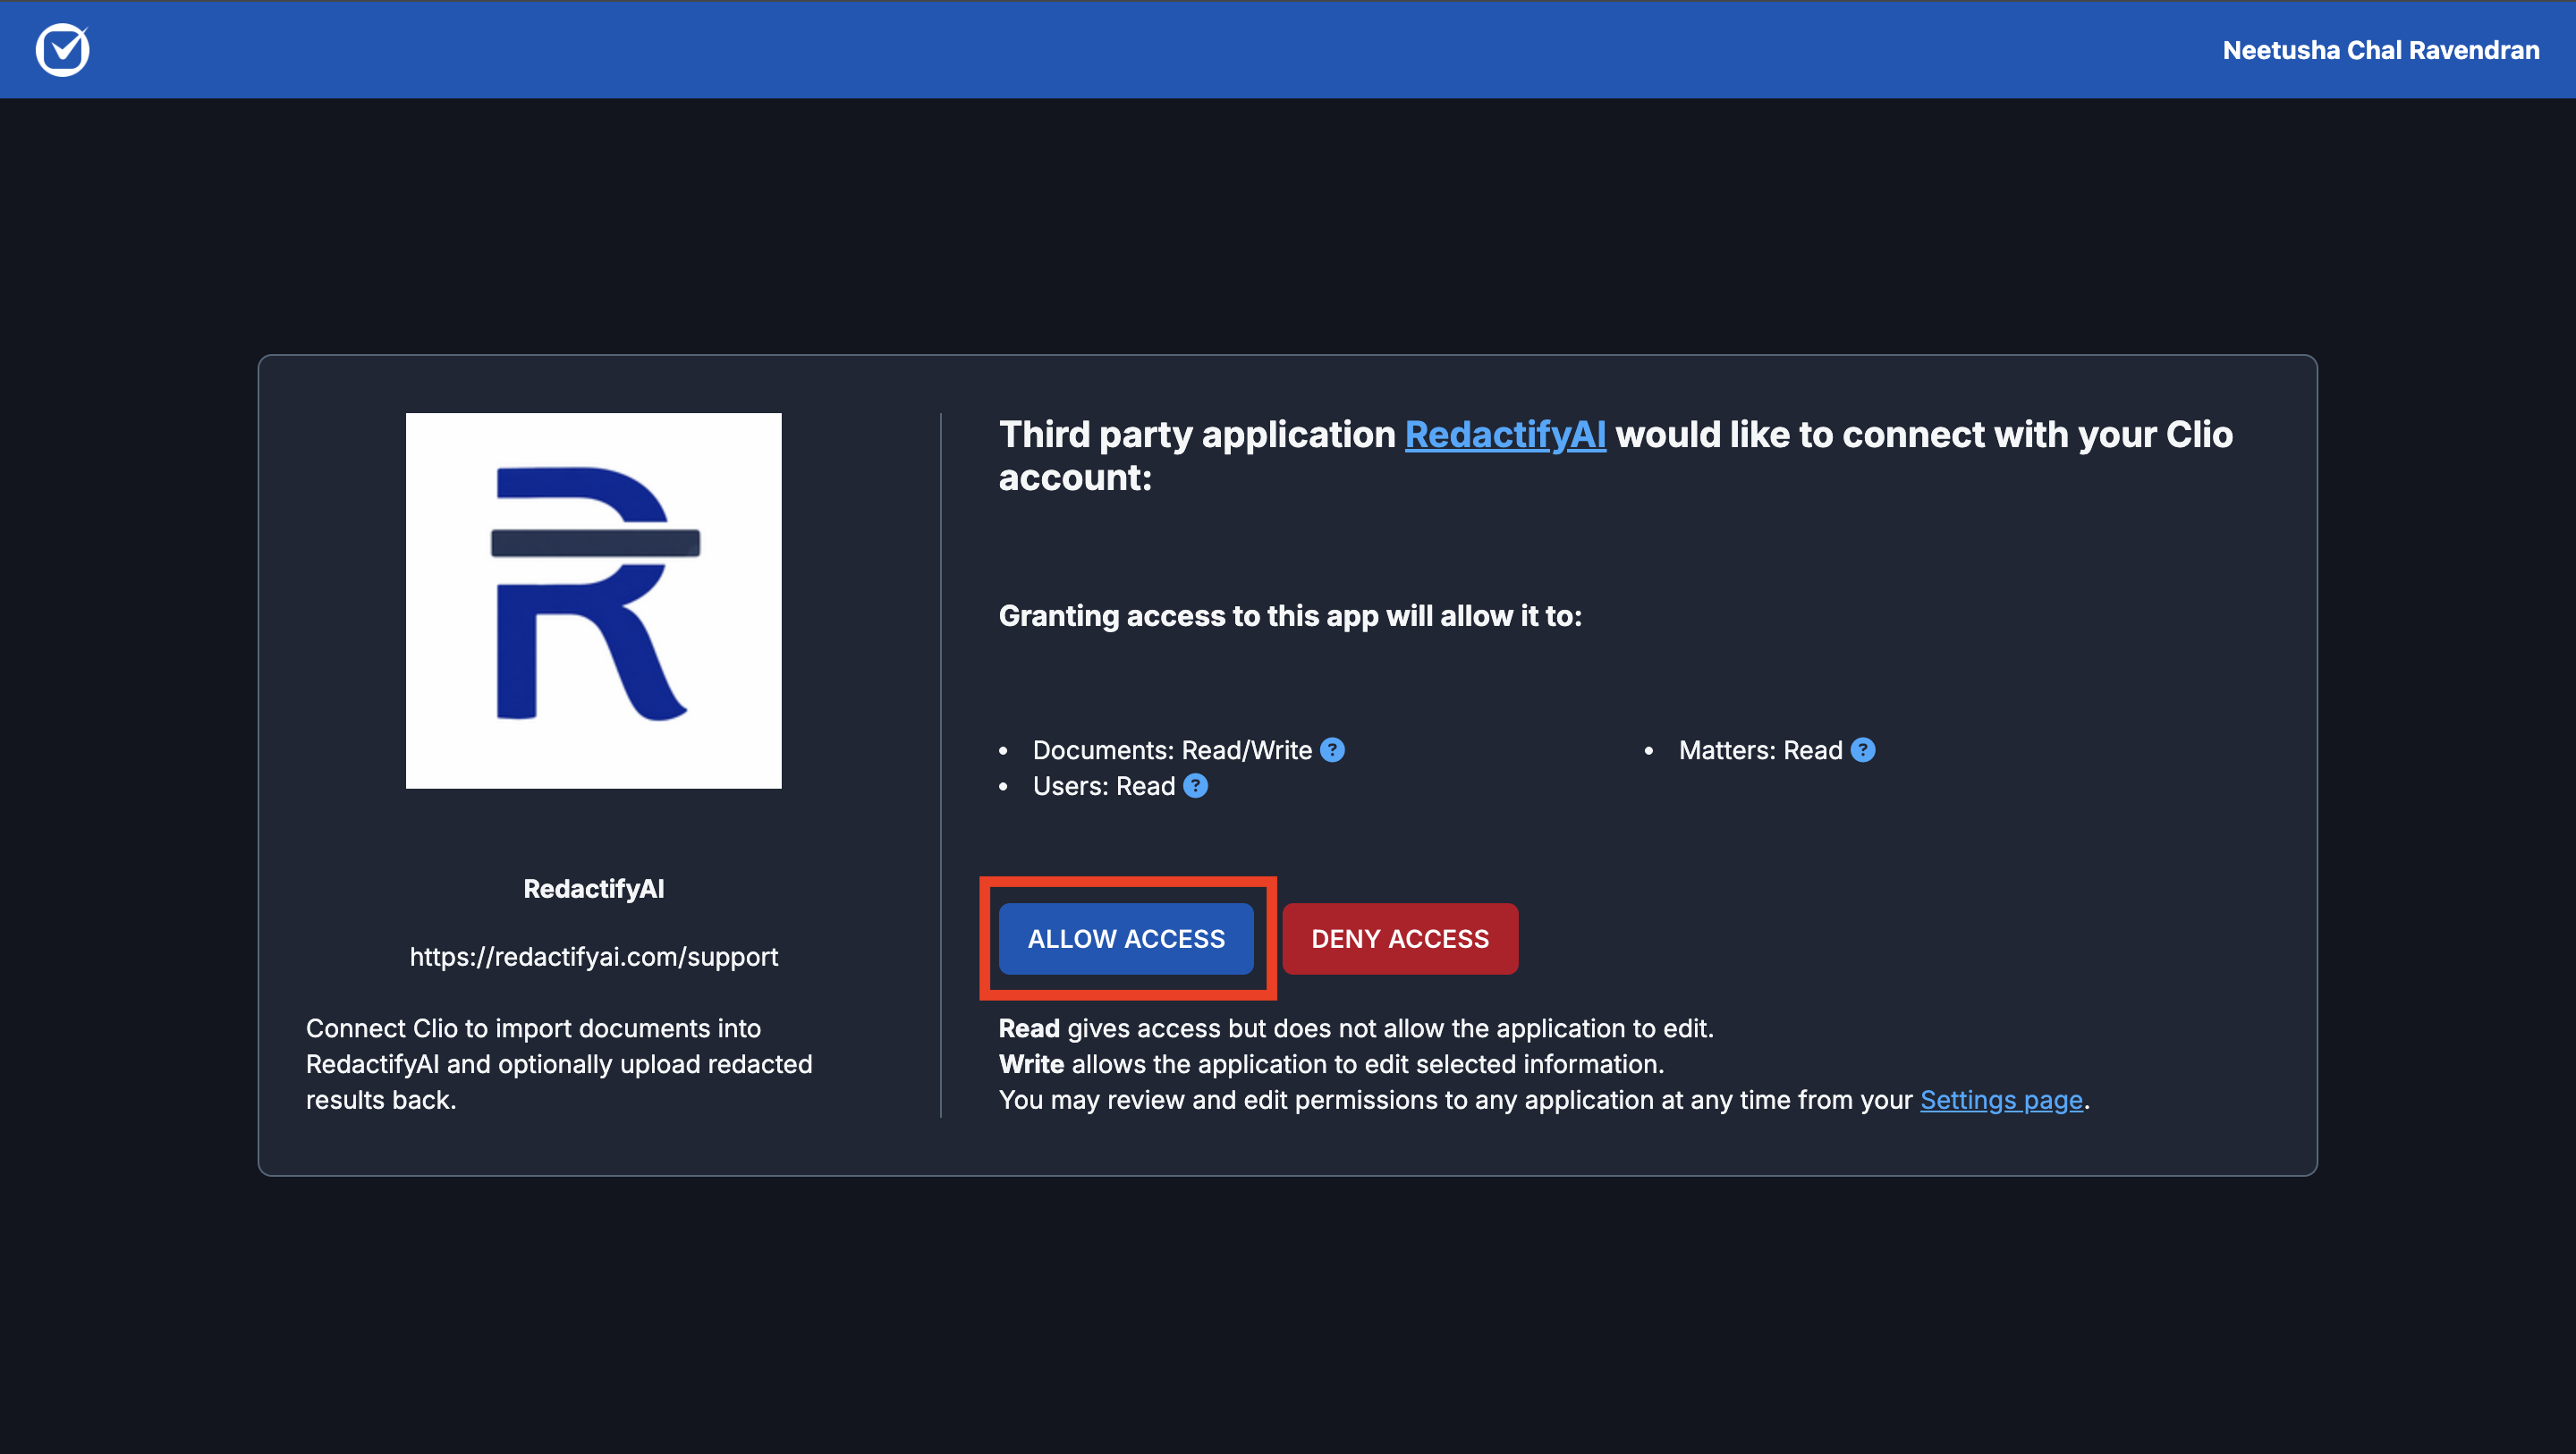
On the RedactifyAI Documents page, click the Clio logo icon in the upload section at the top. The Import from Clio pop-up will appear. Click Connect Clio and you will be taken to Clio's authorization screen, where you grant RedactifyAI access to your matters and documents.
This is a one-time setup. Once authorized, you can import from any matter without reconnecting.
Documents page
Import From Clio pop-up
Clio authorization screen
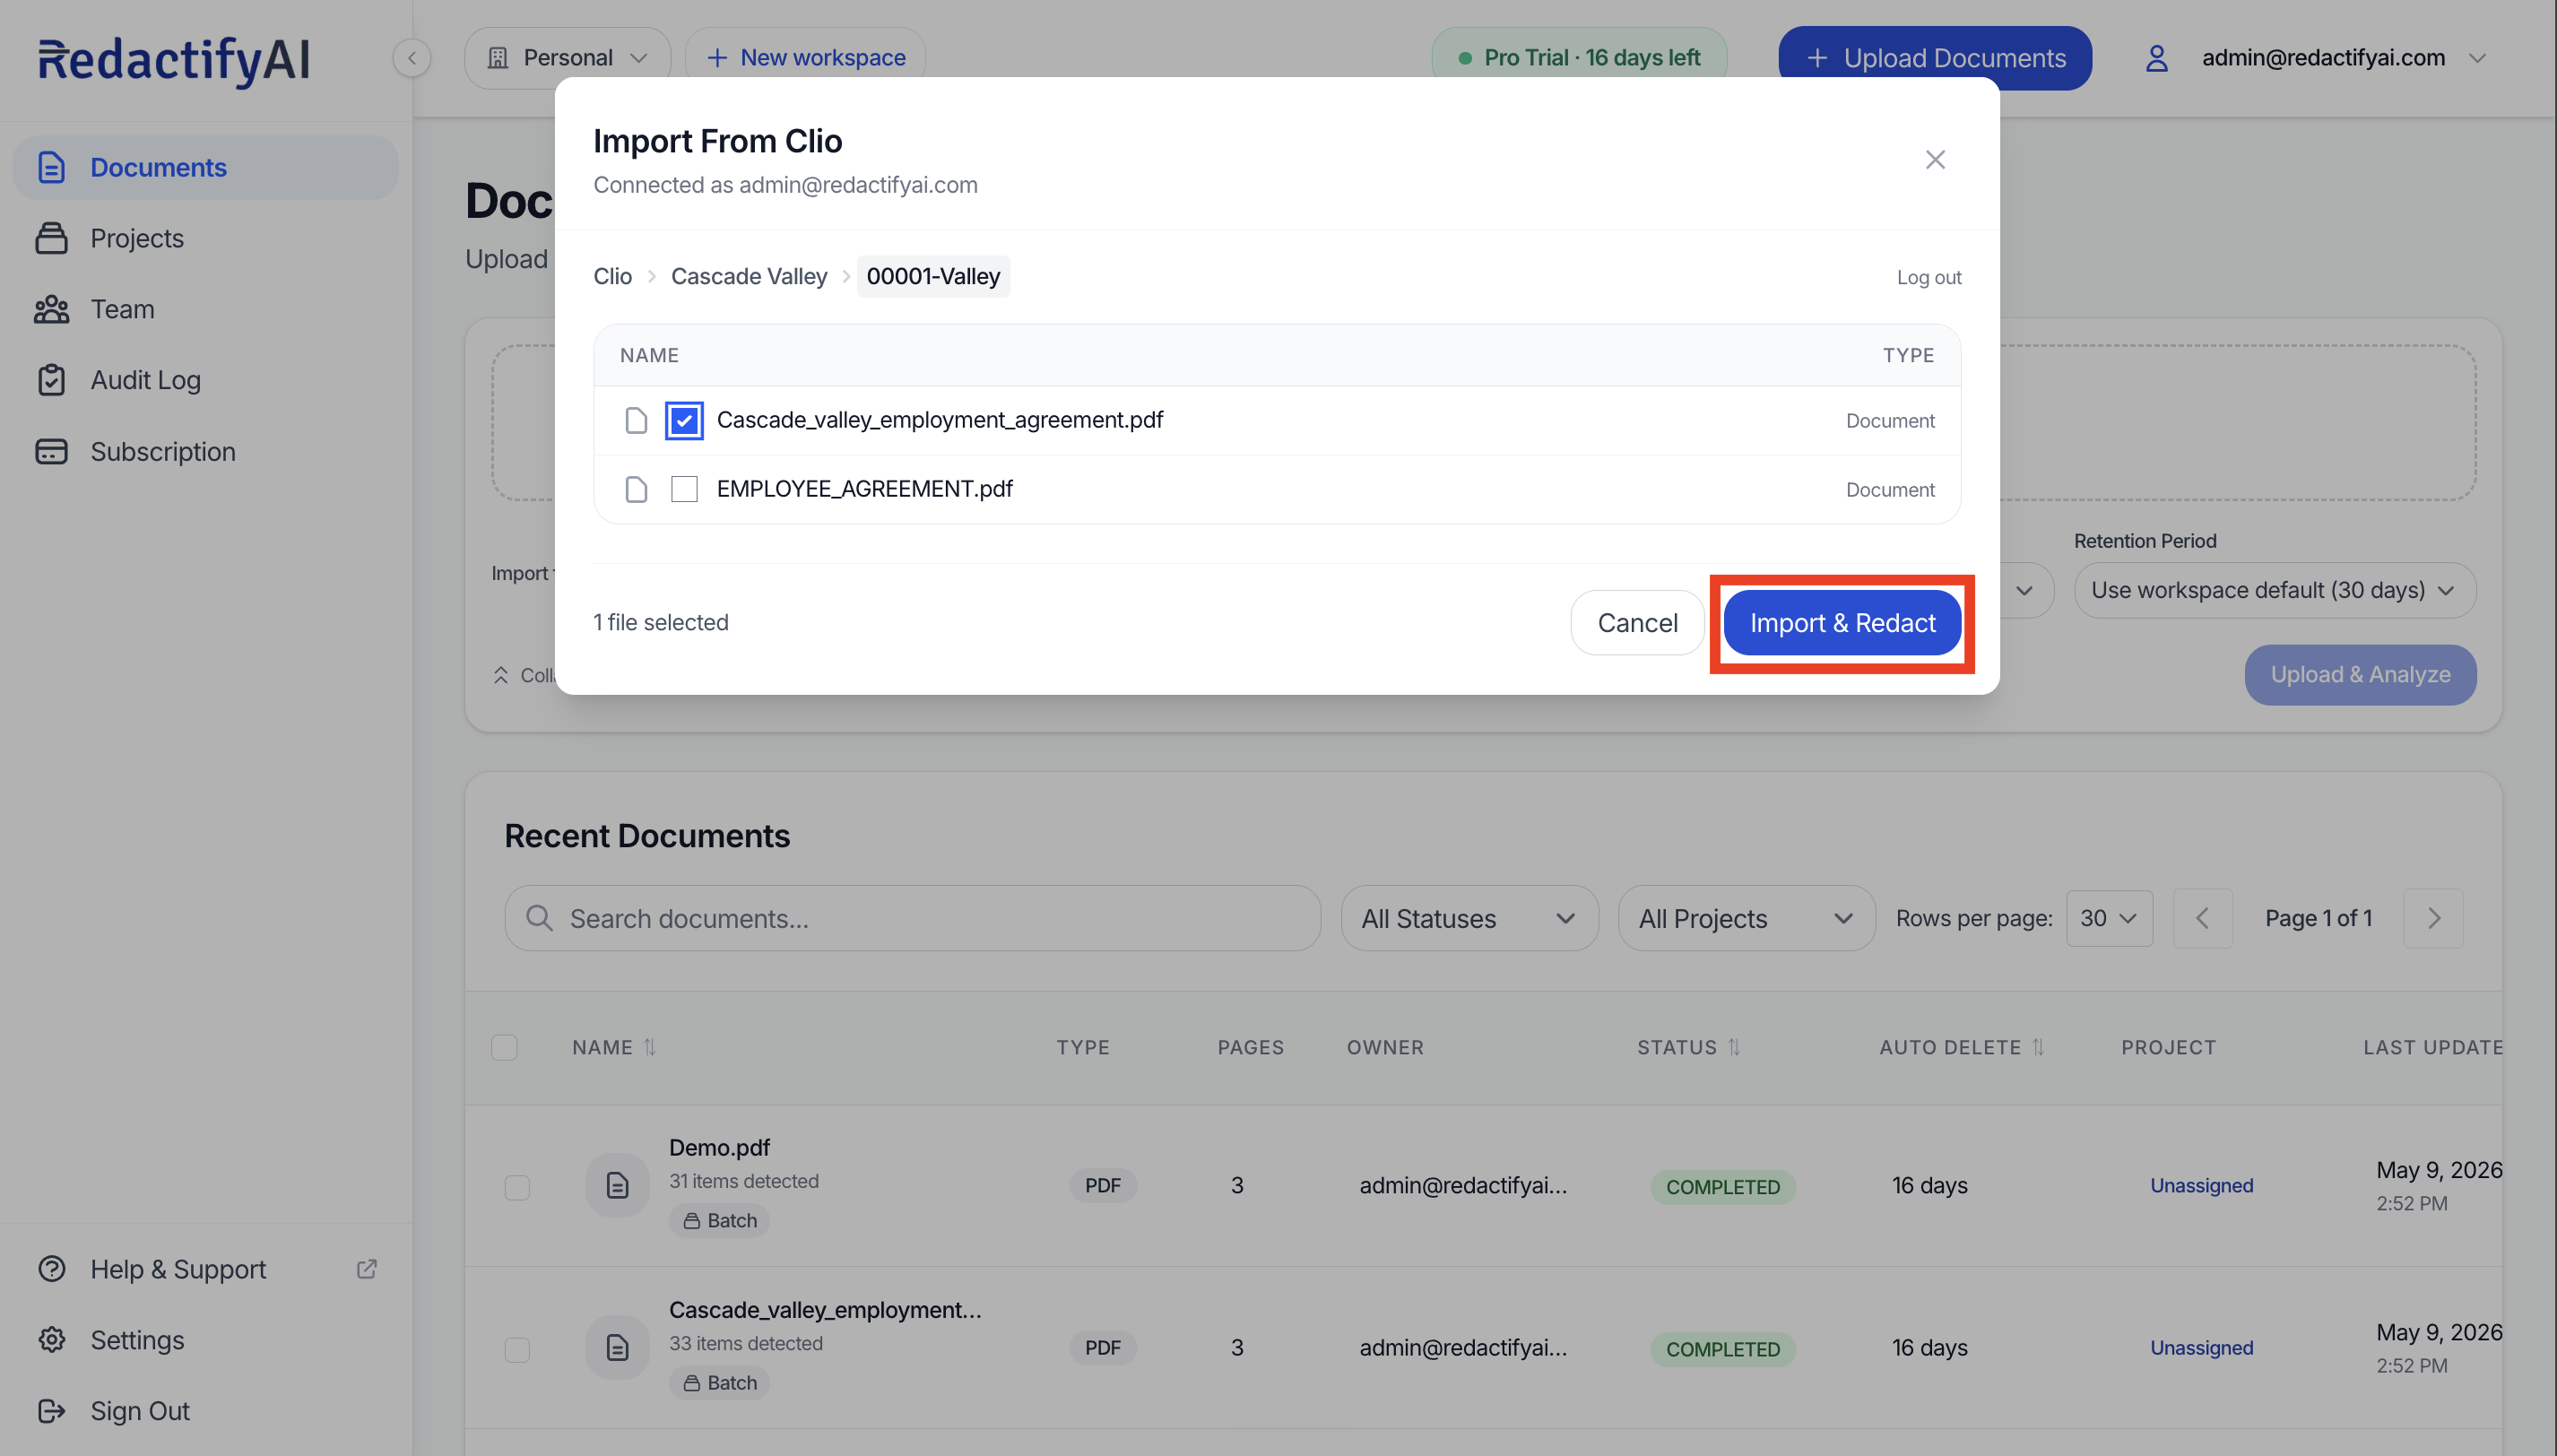
Select files from your Clio matter
Once connected, the Import from Clio pop-up shows all your Clio matters and their document folders. Navigate to the matter you need, open the relevant folder, and select one or multiple files to import.
Supported file types are PDF, Word (DOCX/DOC), and images (TIFF, PNG, JPG). Scanned PDFs work with the built-in OCR. No conversion needed before you import.
Selecting files from a Clio matter
Redact the document with AI
Once the document is imported, RedactifyAI scans it for sensitive content. It reads the full text, including scanned pages via built-in OCR, and flags names, addresses, social security numbers, dates of birth, and other PII.
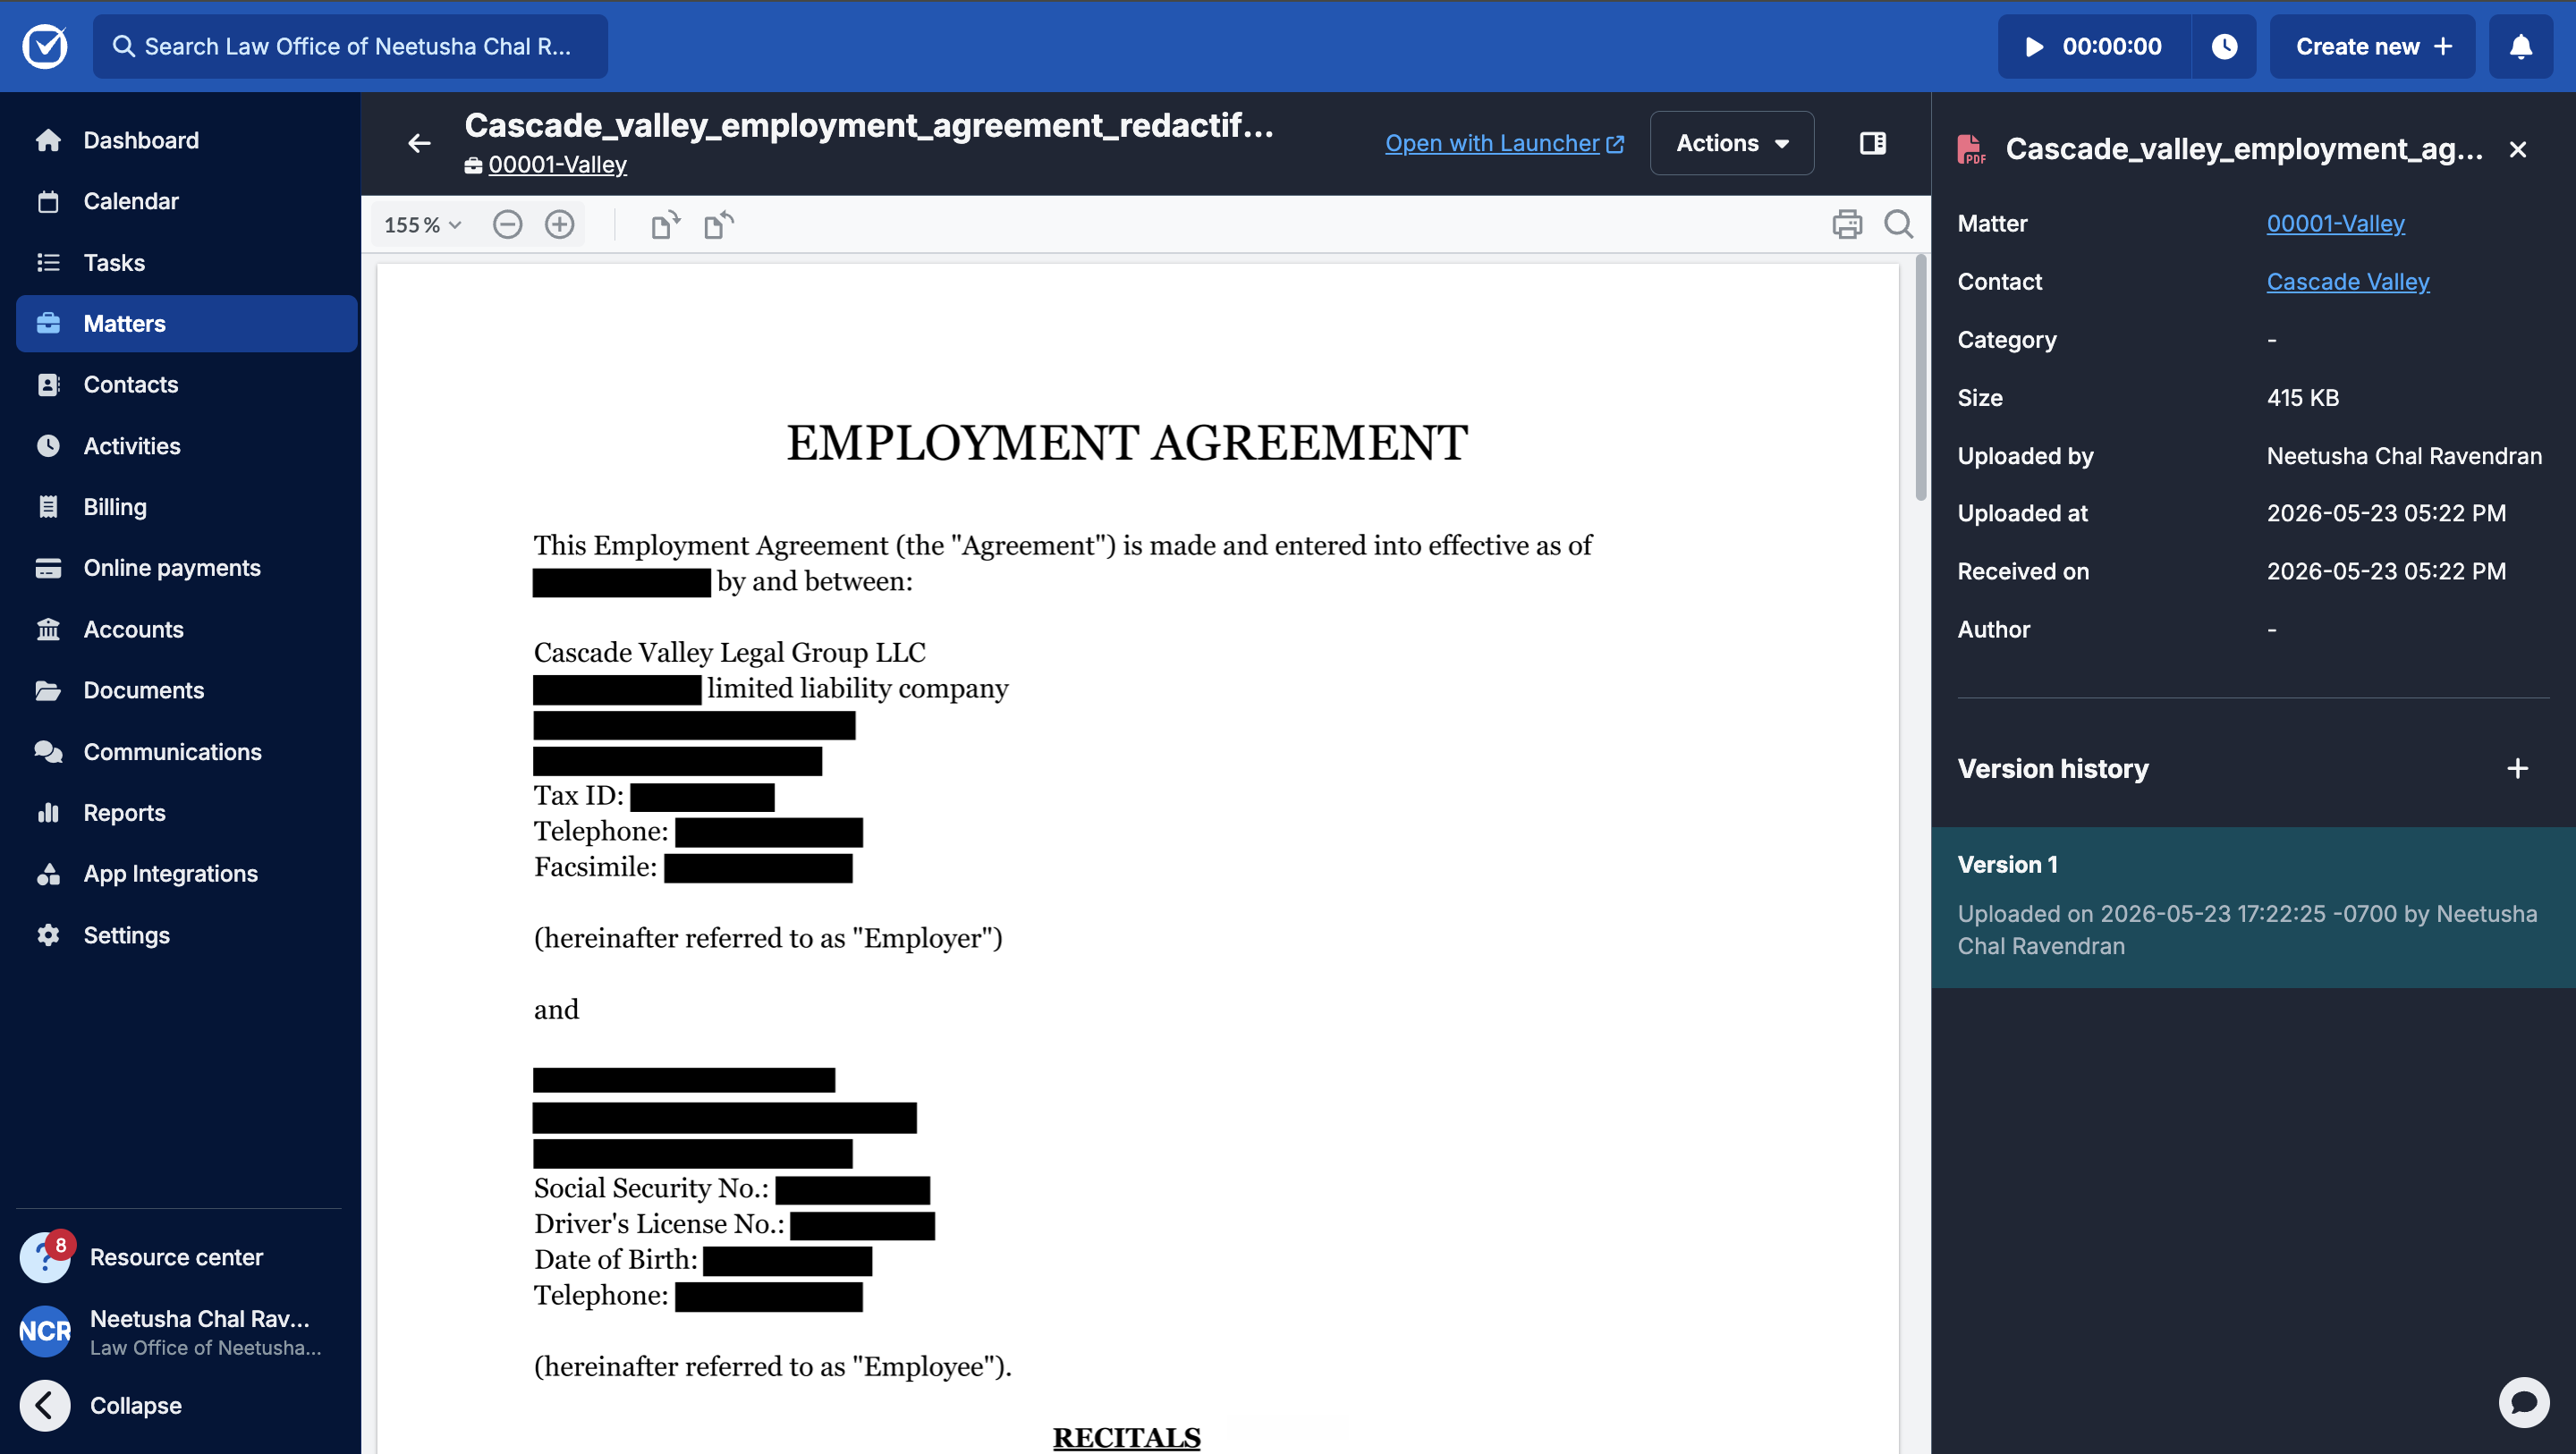
Each detected item is highlighted with a green check mark. You can enable or disable individual items, or toggle an entire category of sensitive items at once. Use the Redaction Preview toggle to preview how the redactions will appear before applying them. Once you are satisfied, click the Confirm Redaction button in the bottom right. The sensitive content is permanently removed from the file, not hidden behind a visual overlay.
AI detection results
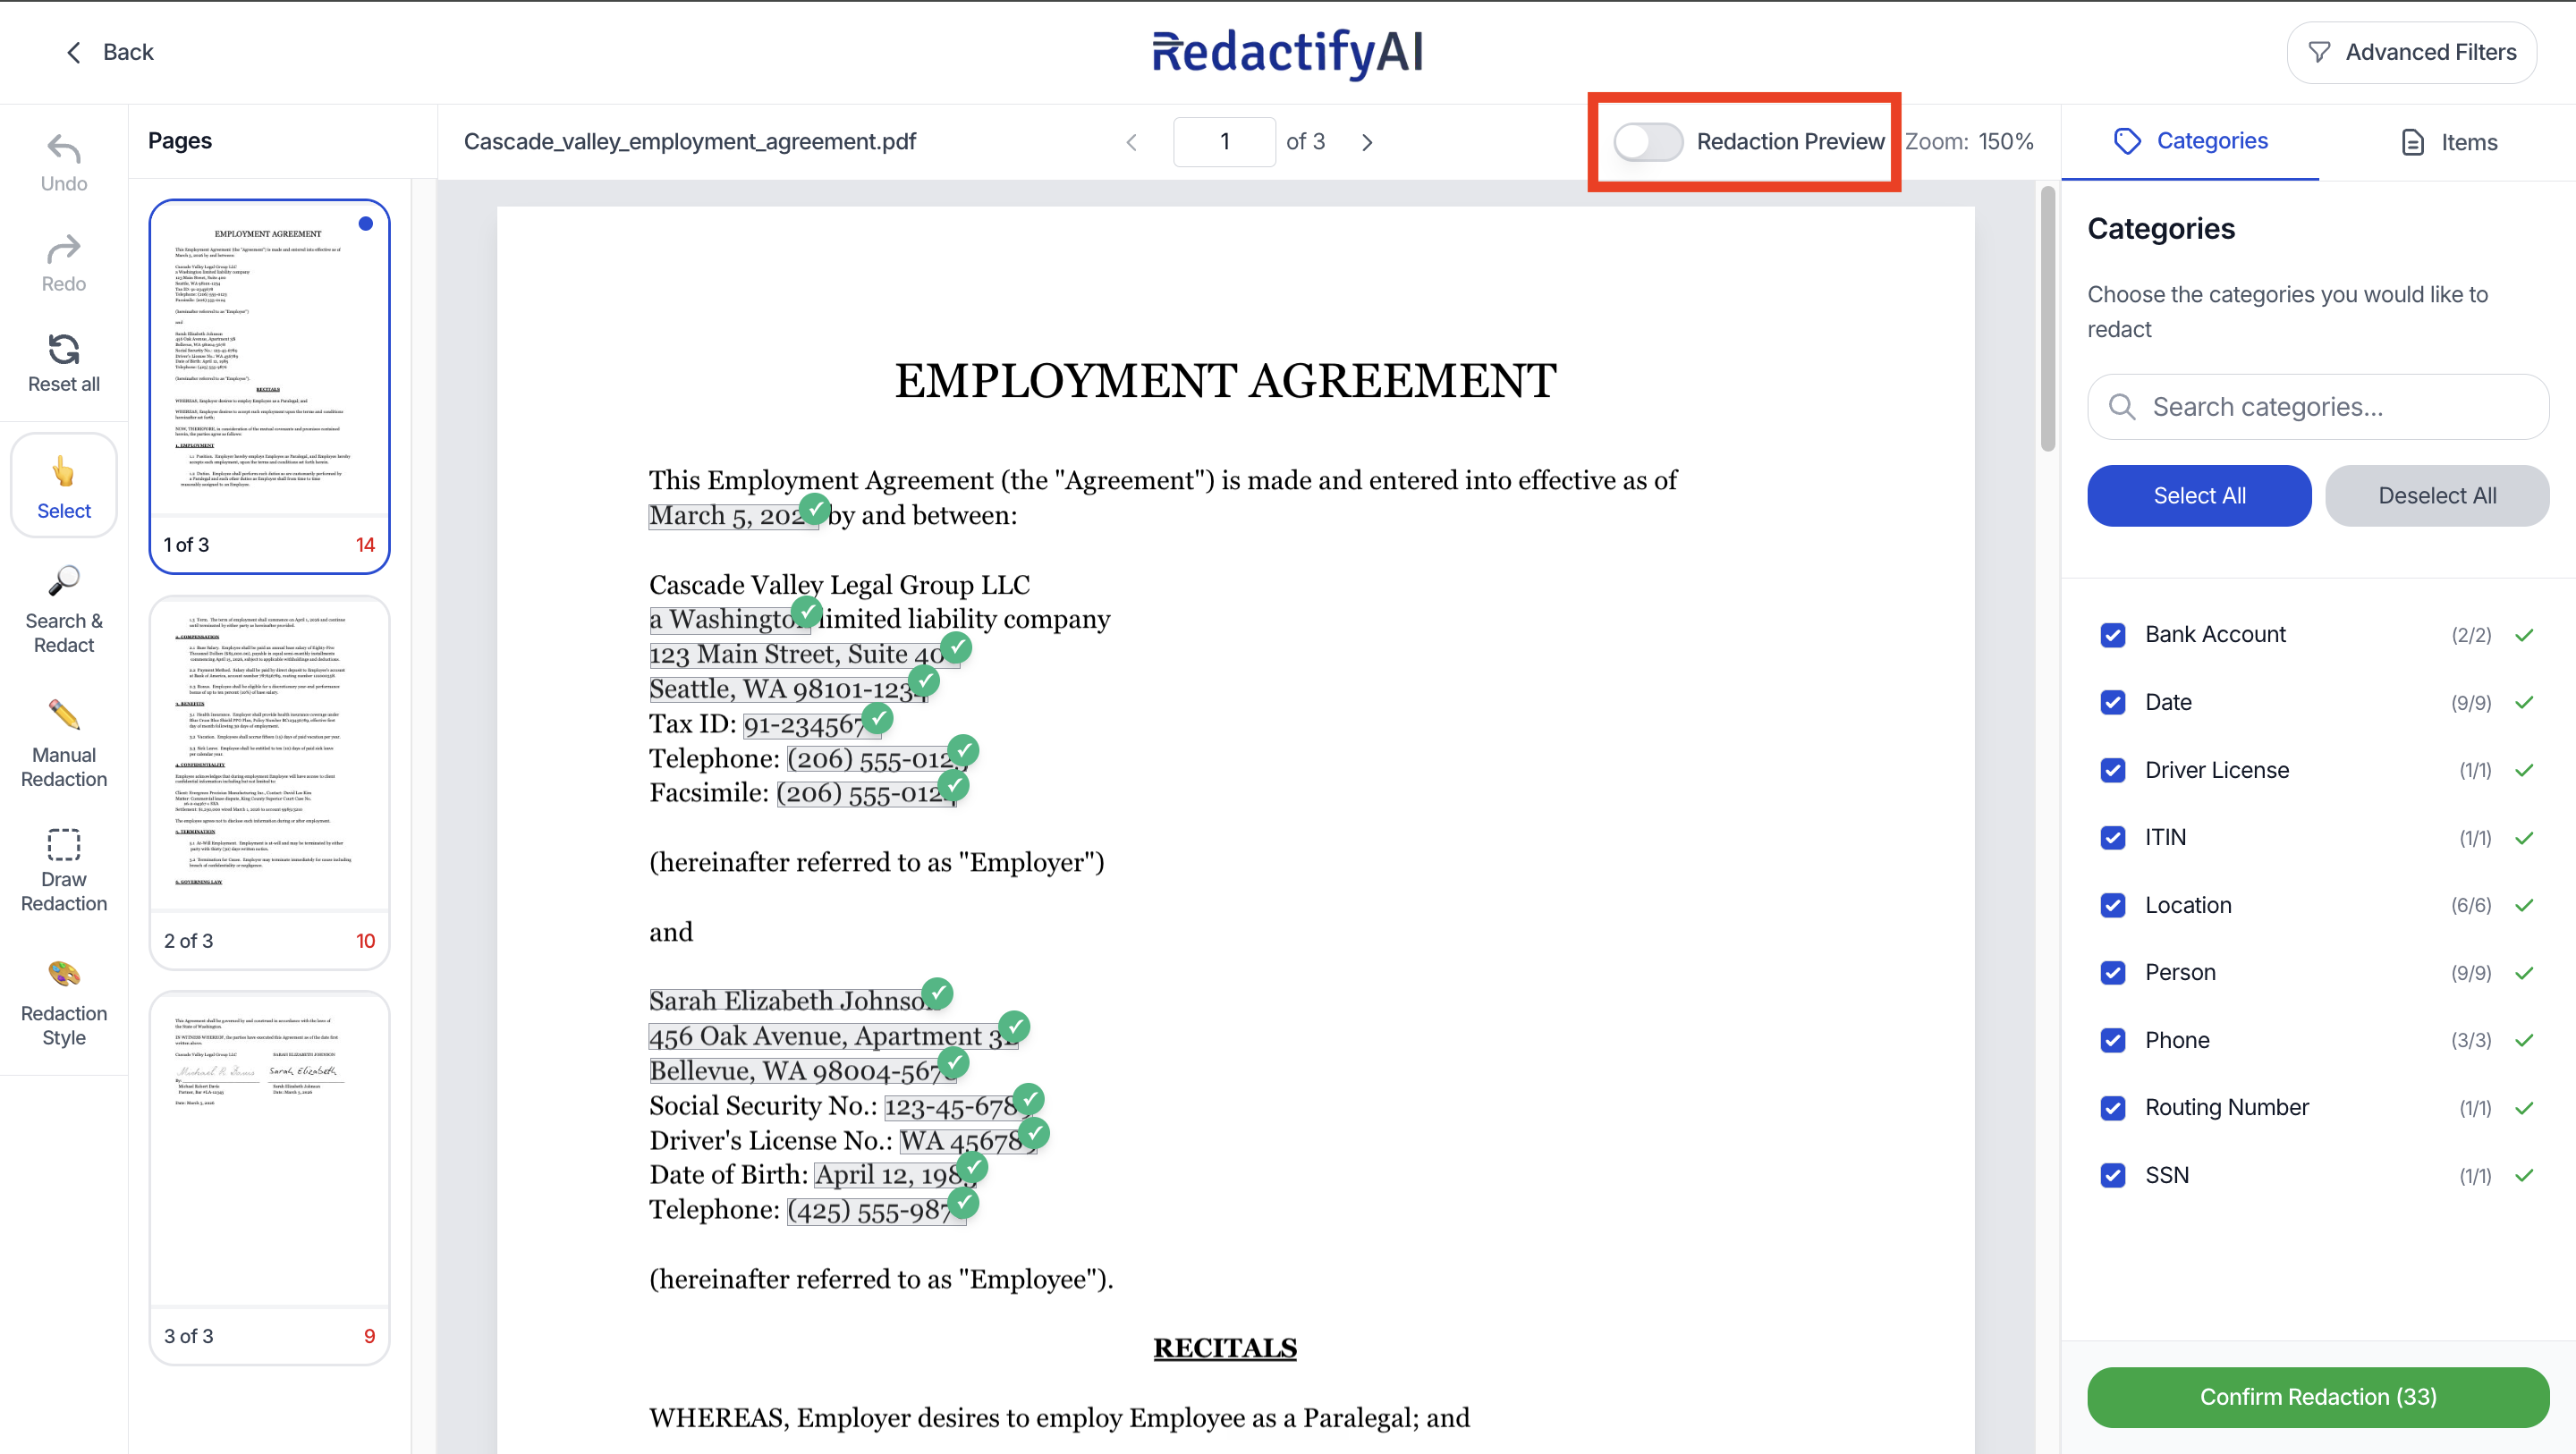
Redaction preview enabled
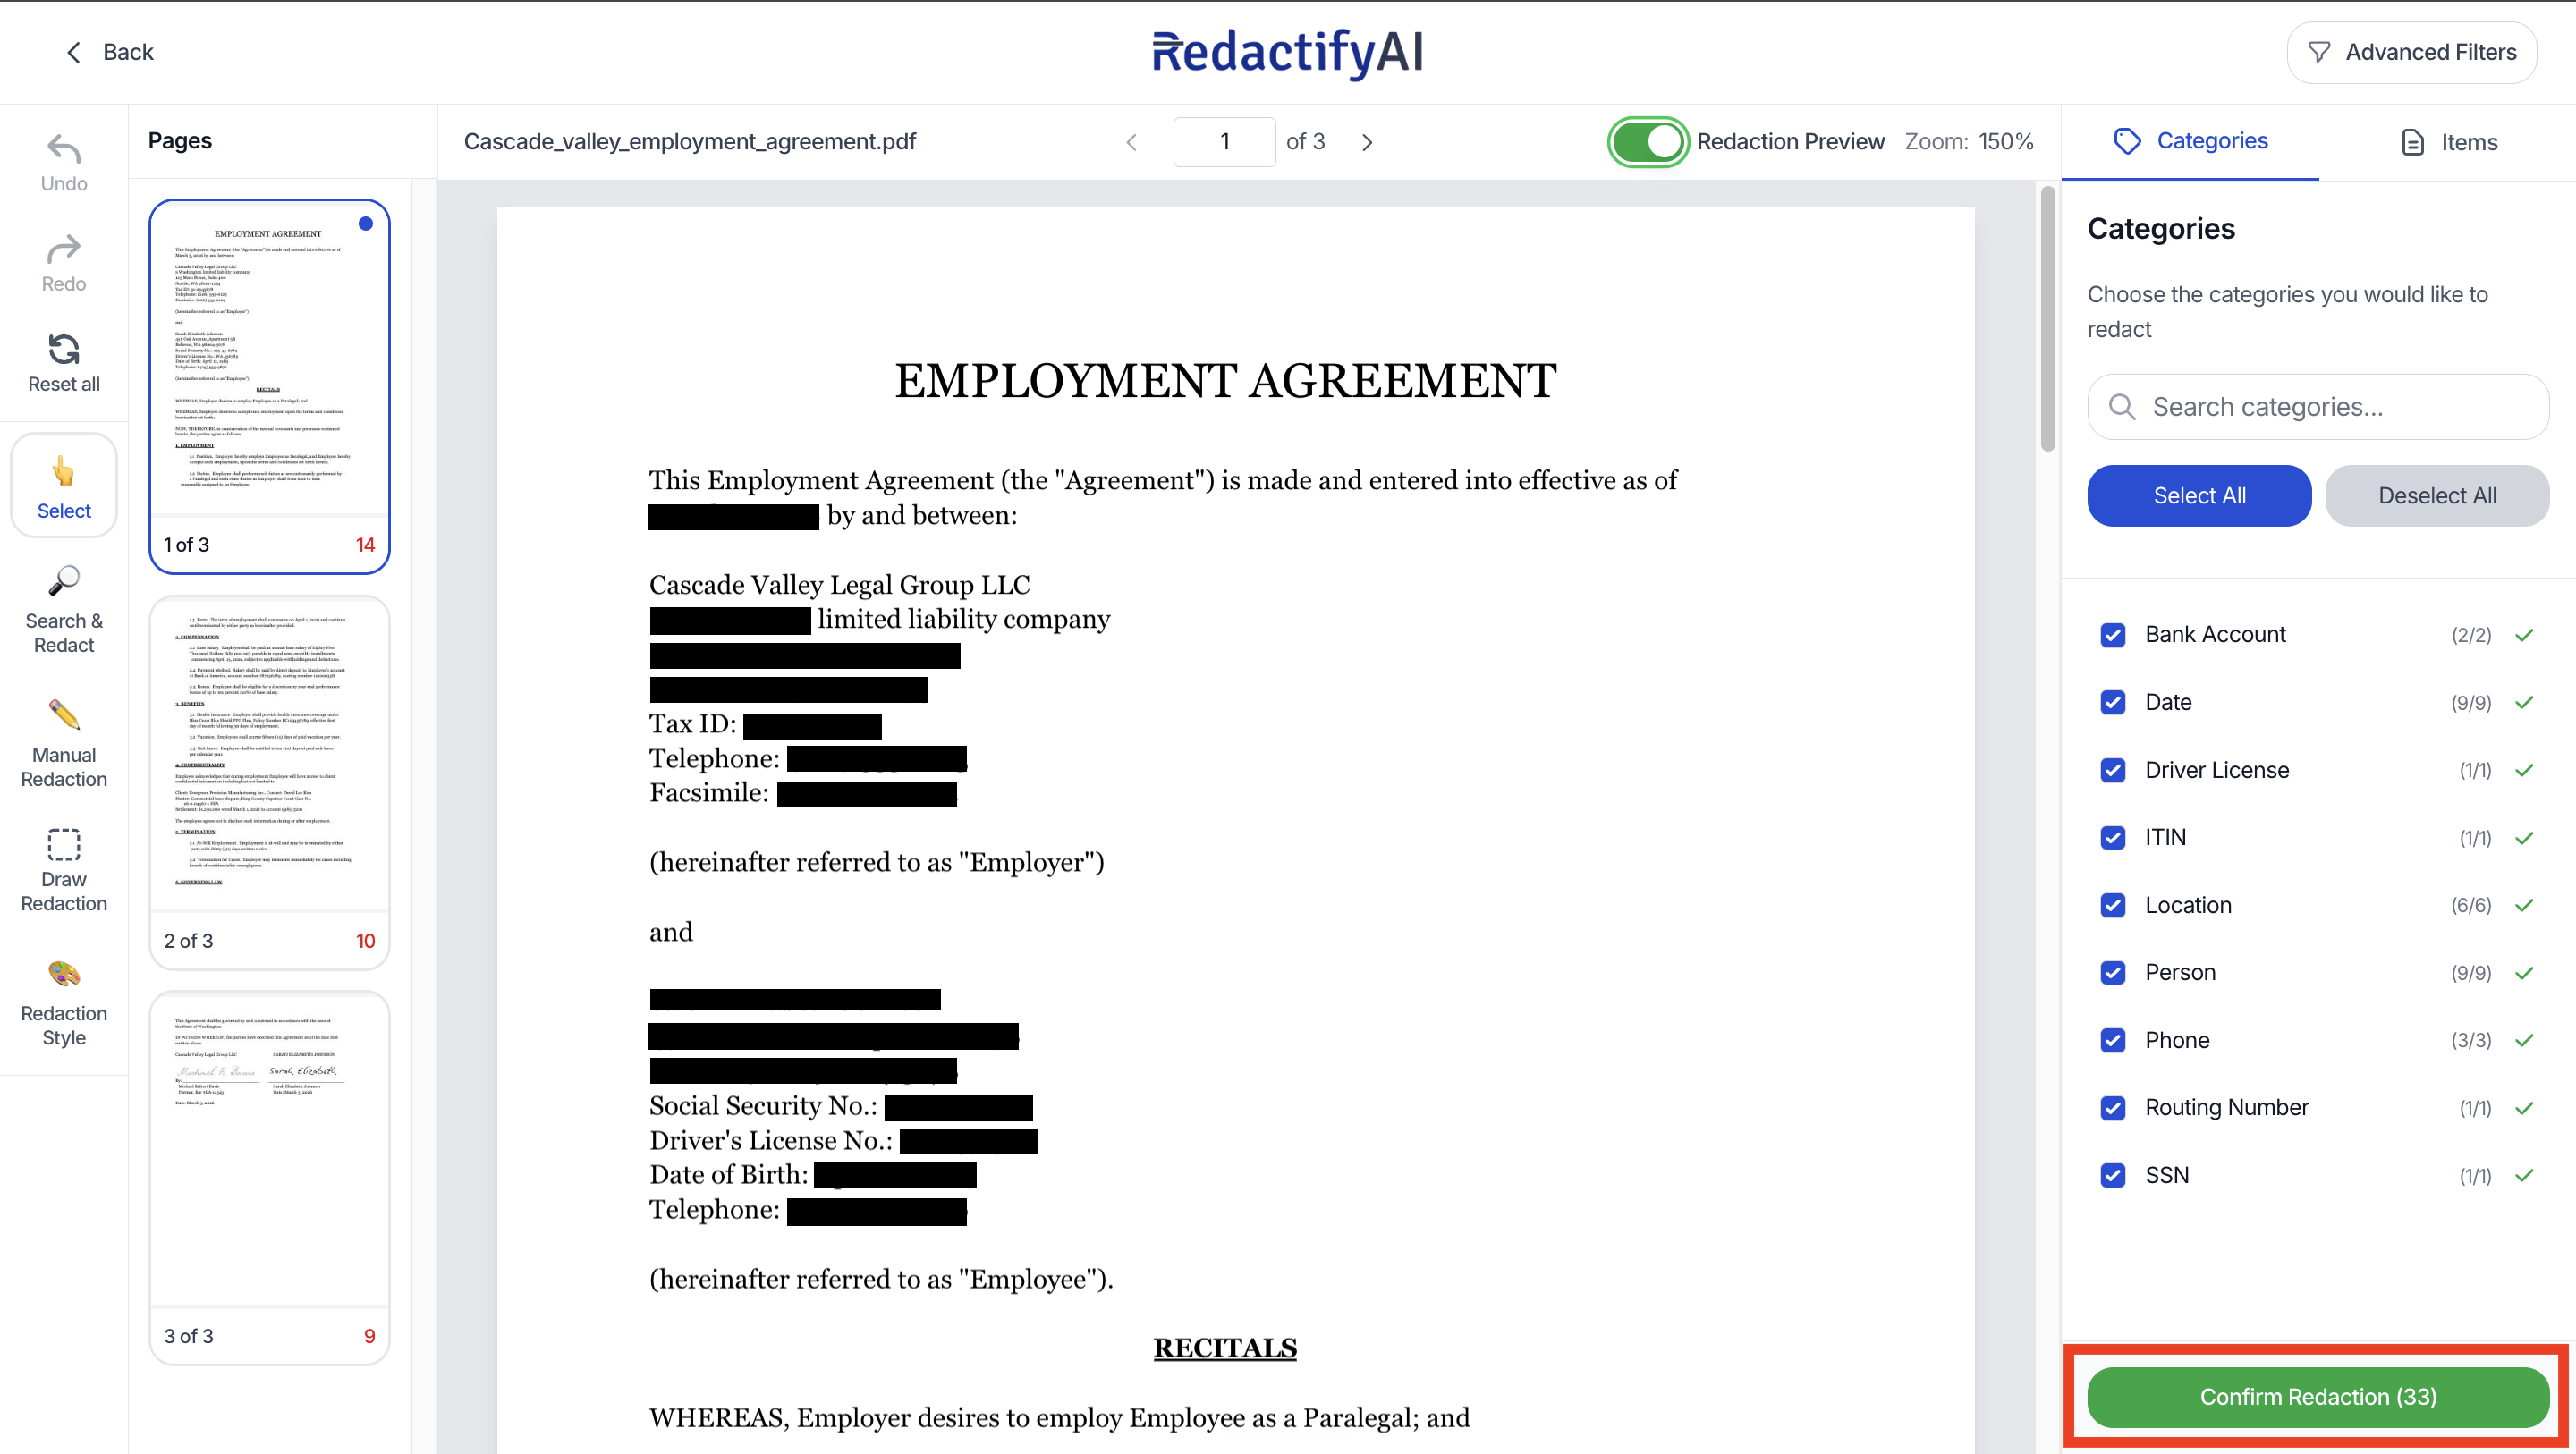
Redacted file appears in Clio automatically
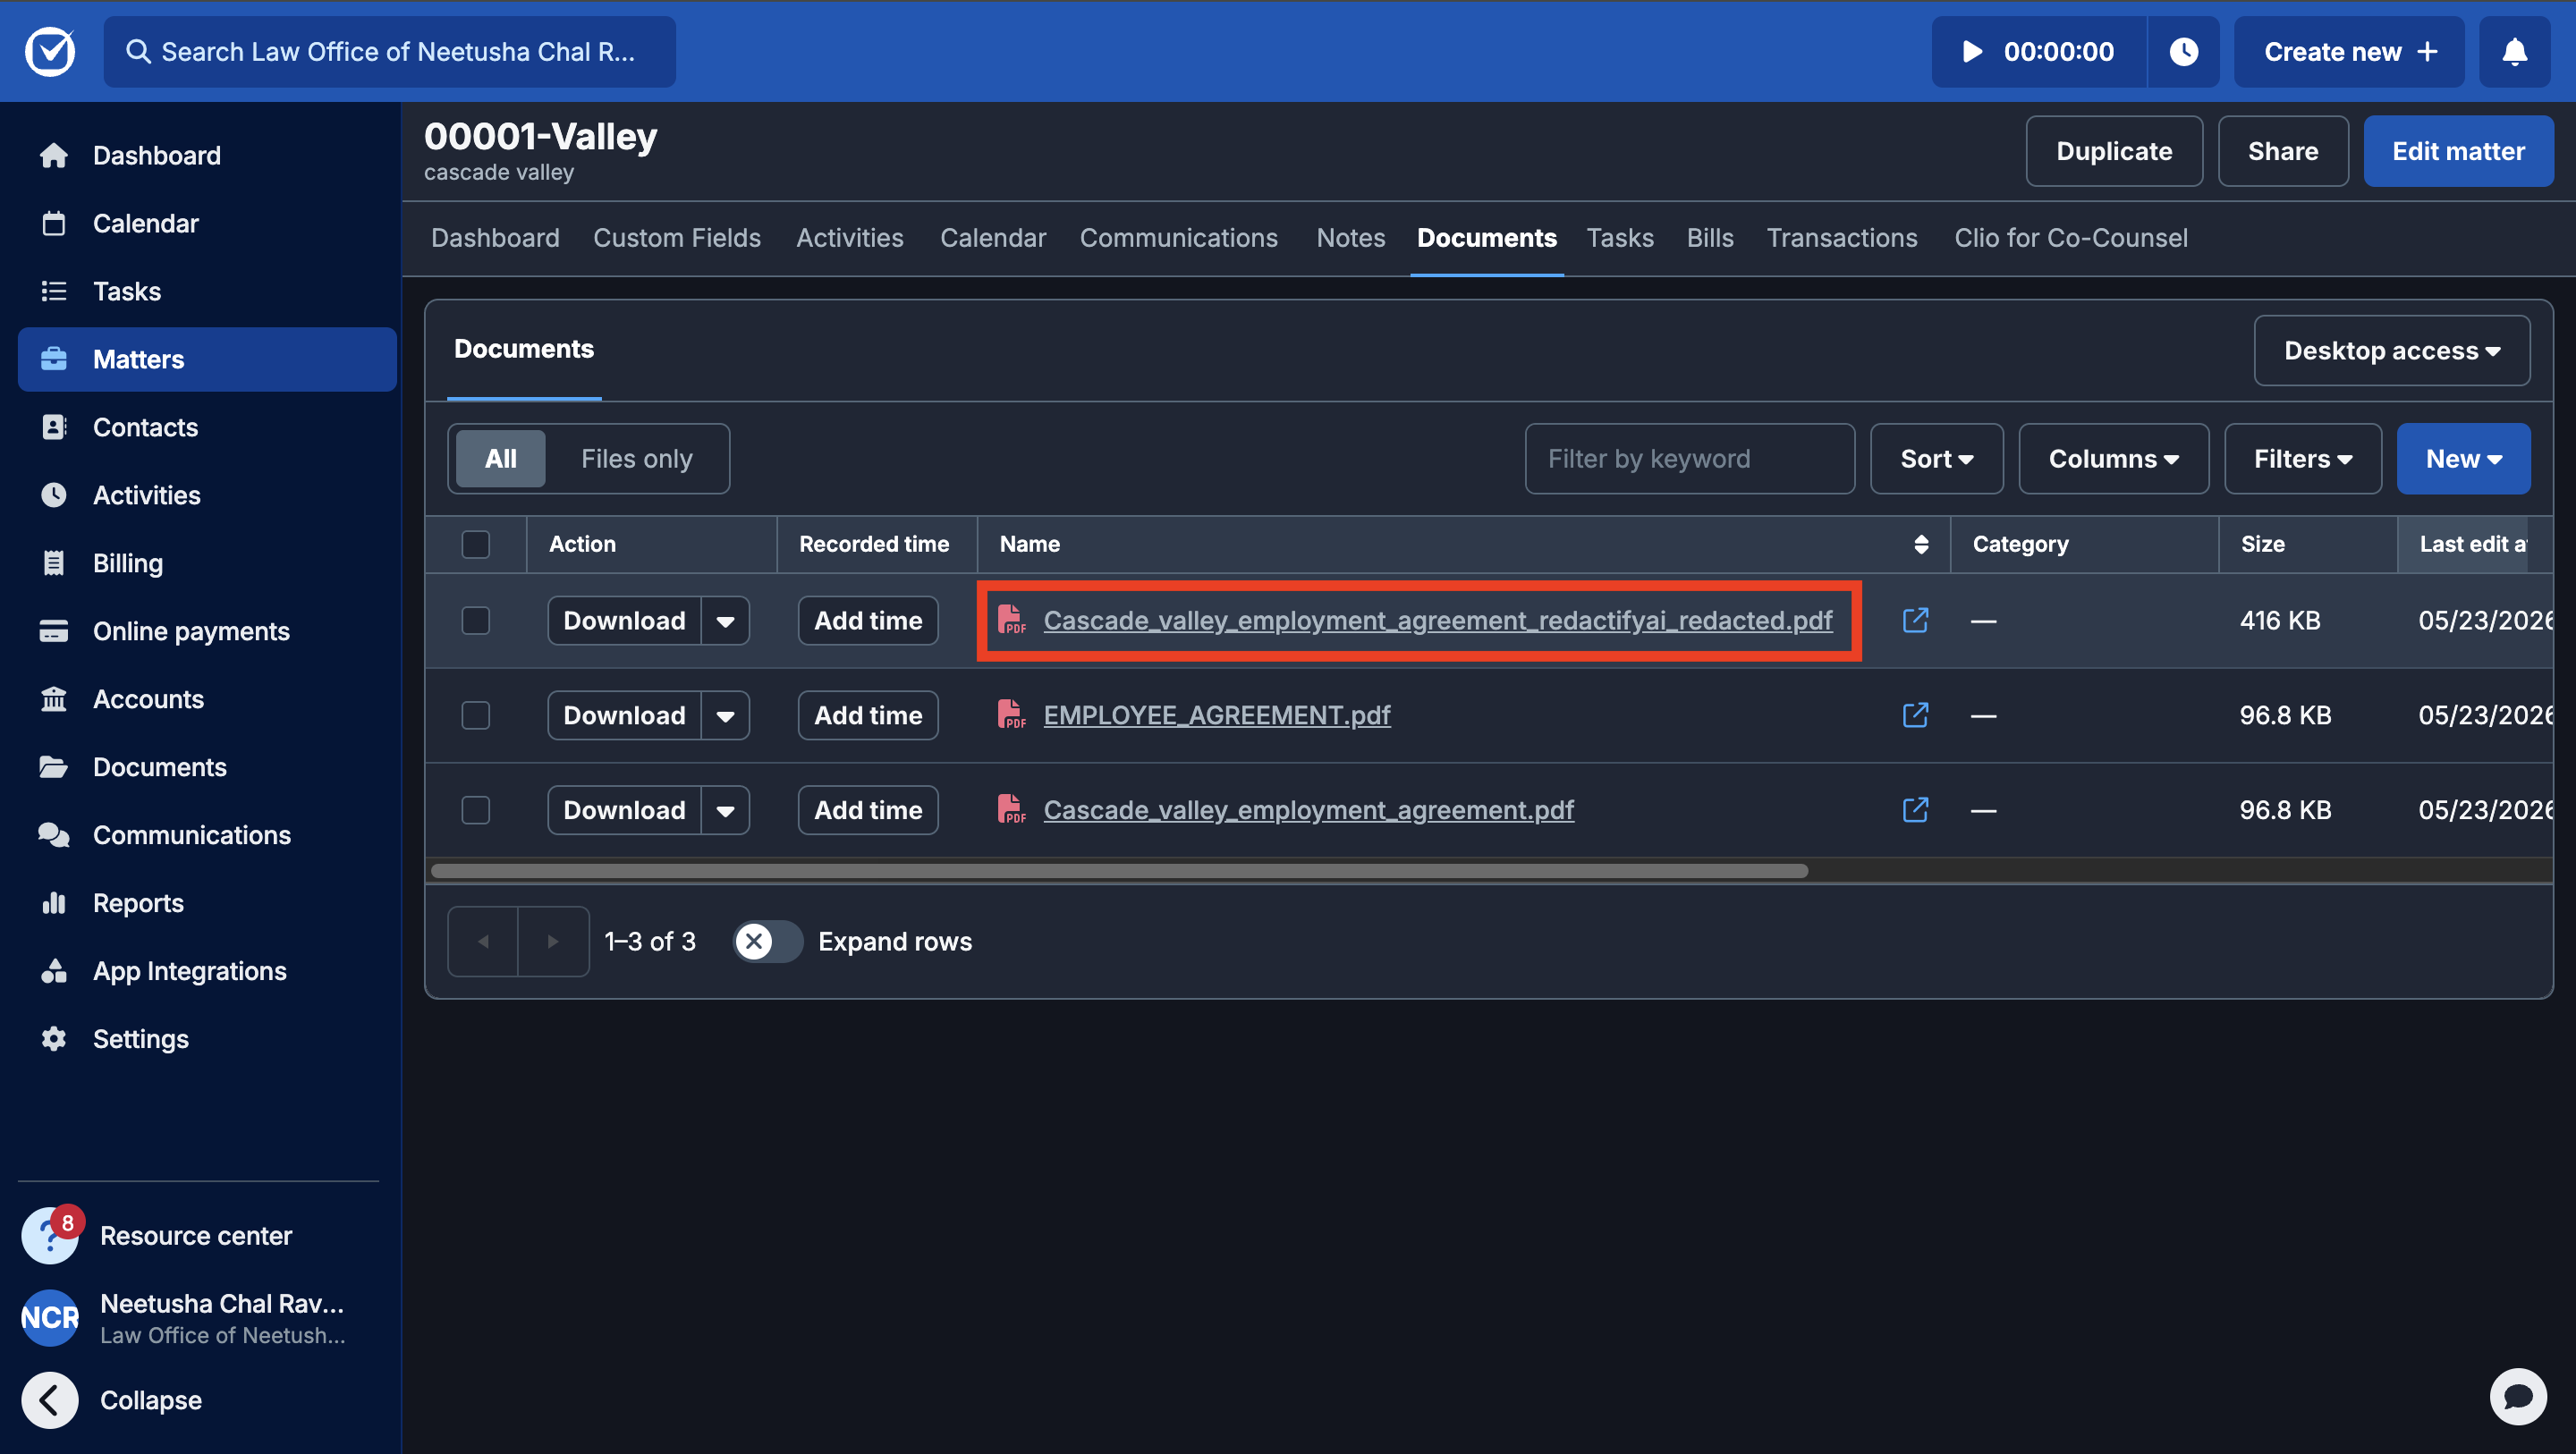
As soon as redaction is complete, RedactifyAI automatically uploads the redacted document back to the same folder in your Clio matter. The redaction results page confirms the upload with the new file name and a full version history.
The file is named after the original with a _redactifyai_redacted suffix, for example, Cascade_valley_employment_agreement_redactifyai_redacted.pdf. Redact the same document again and it gets a version number: _redactifyai_redacted_v2.pdf.
Your original document is always safe.
RedactifyAI saves the redacted document as a new file in the same Clio folder alongside the original. The original is never overwritten or modified. Both versions are available in Clio whenever you need them.
Redaction completed
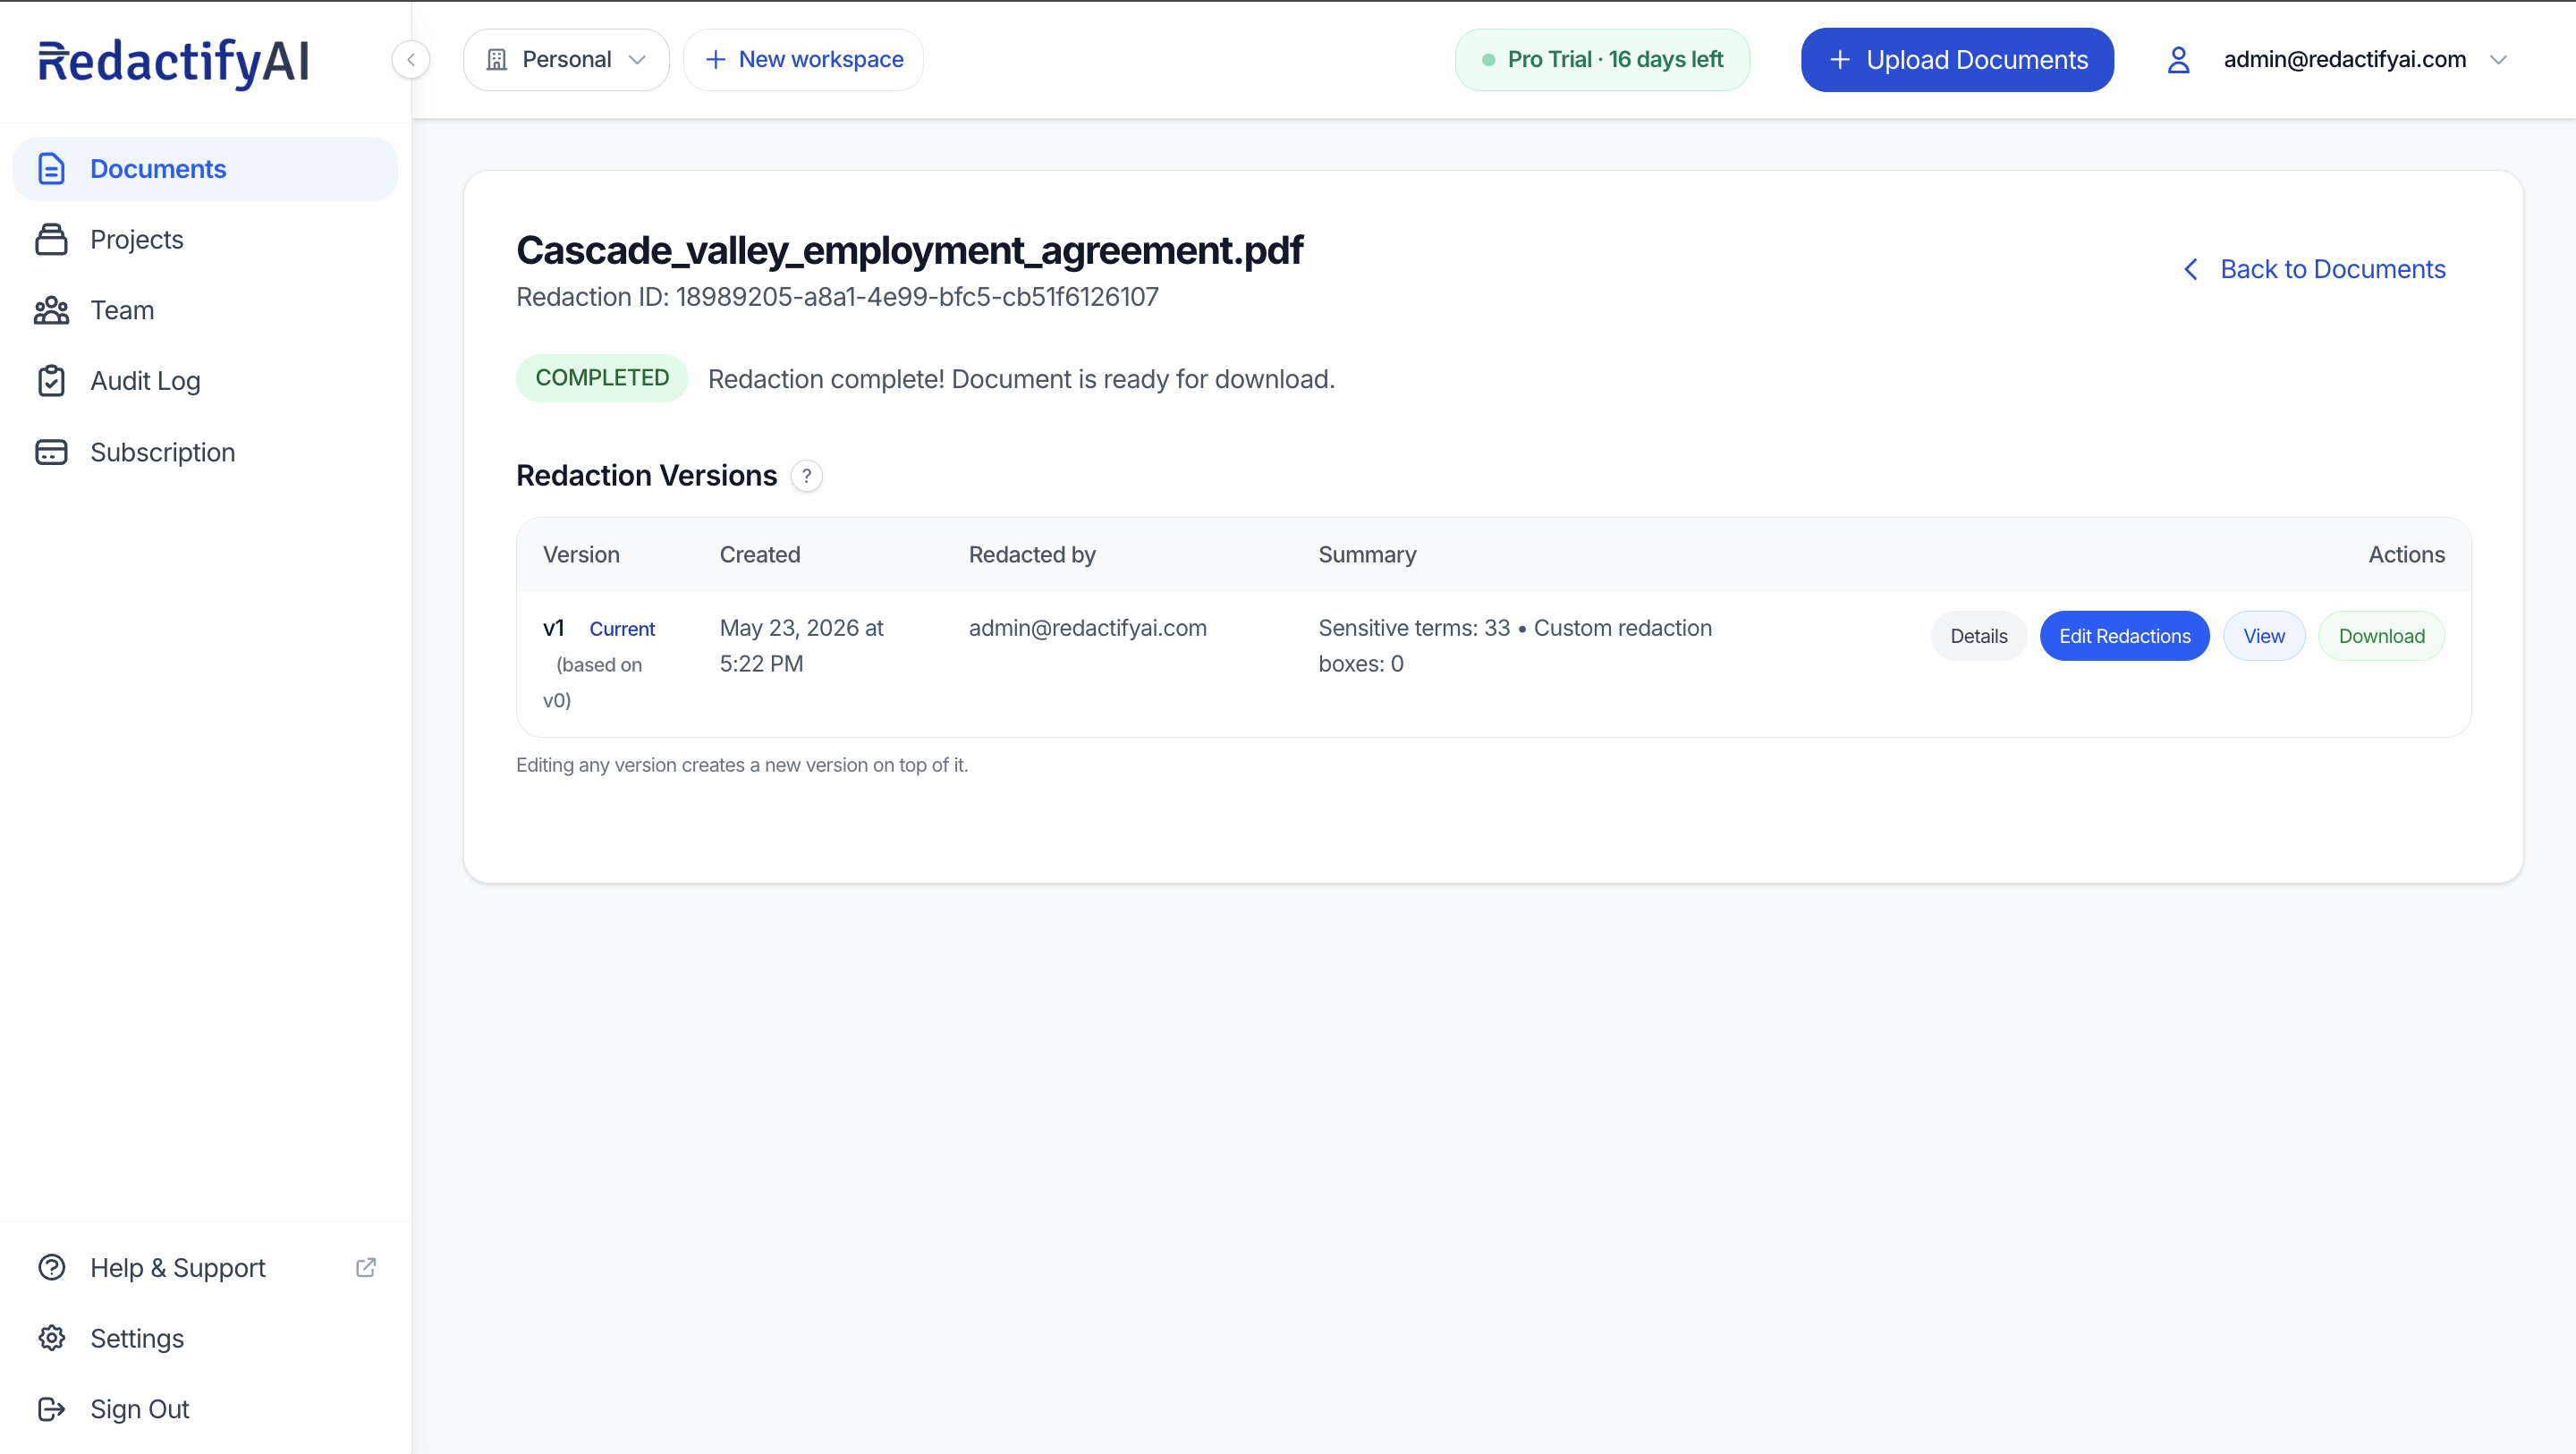
In Clio: before redaction
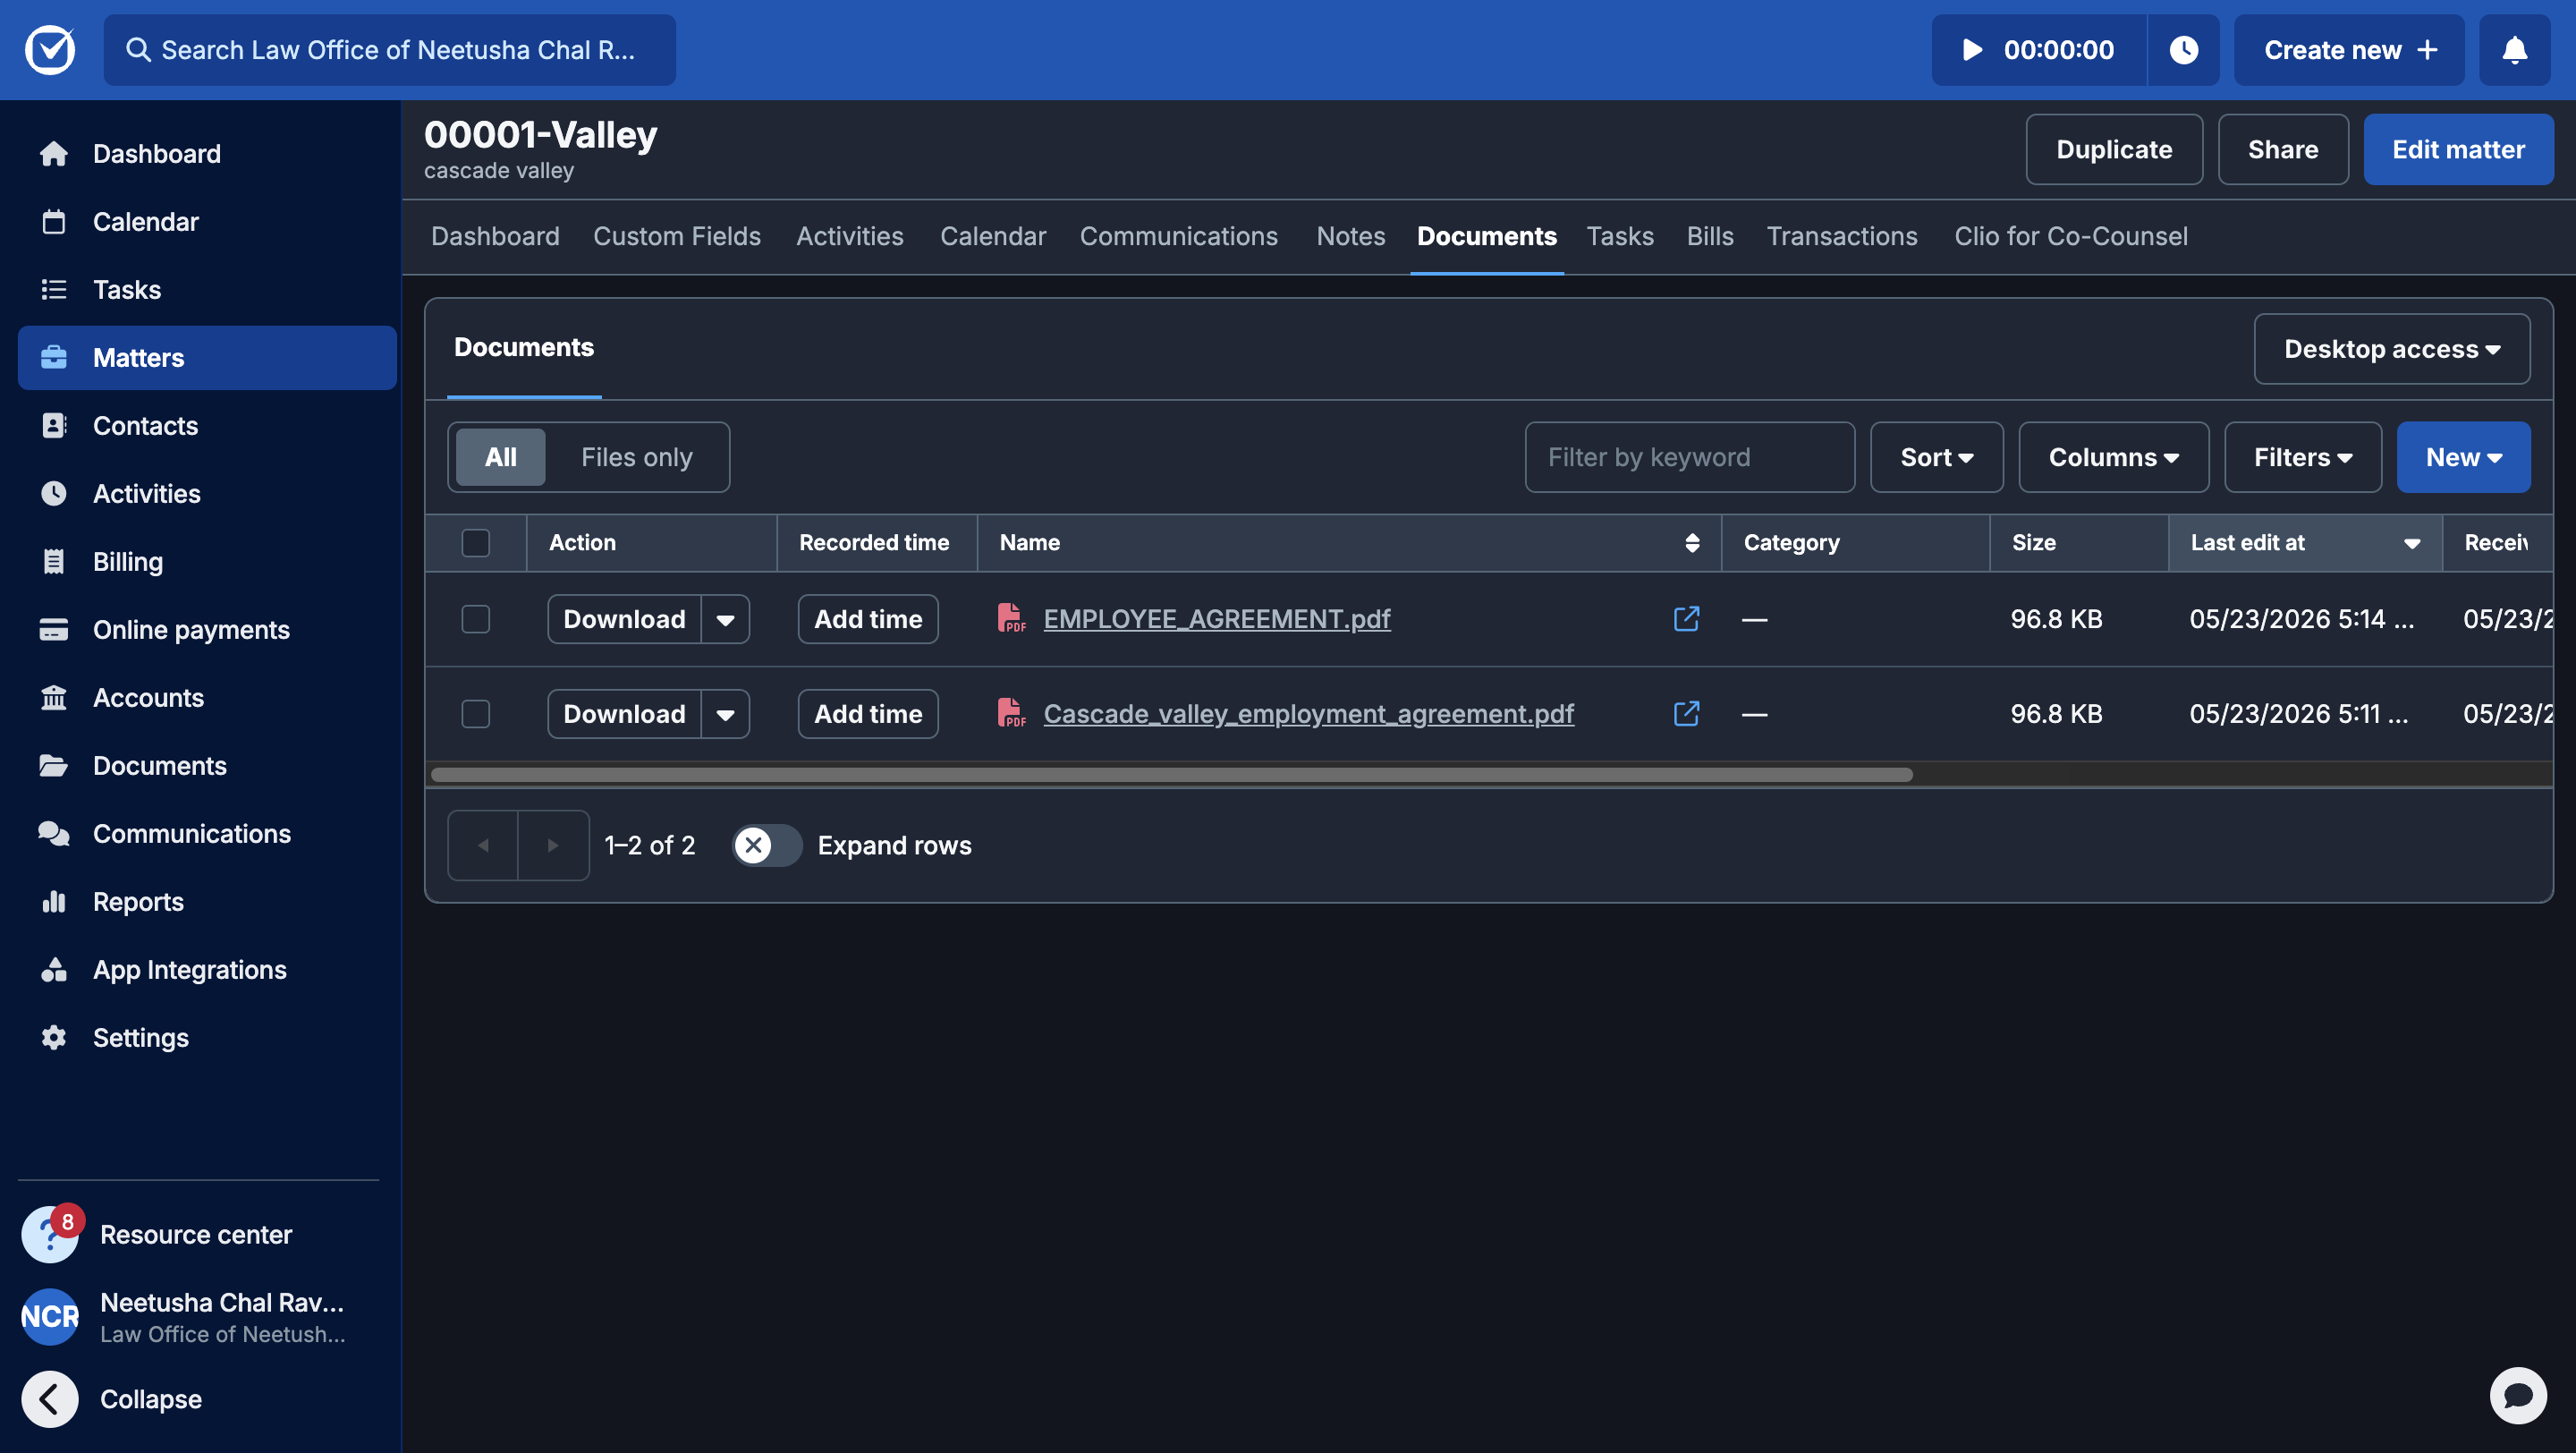
In Clio: after redaction
Redacted document open in Clio
Troubleshooting and common questions
The Clio connection is not working. What should I try?
- 1.Log out and log back in to Clio.
- 2.Follow the Connect RedactifyAI to Clio steps in Step 1 of this guide to reconnect.
- 3.Make sure your RedactifyAI plan includes Clio access. View plans
Where does the redacted file appear in Clio?
The redacted file is saved to the same folder as the original document you imported, including nested subfolders. If the original was at Matter › Folder A › Folder B, the redacted copy appears in Folder B. The file is named with a _redactifyai_redacted suffix, for example Cascade_valley_employment_agreement_redactifyai_redacted.pdf.
Which file types can I import from Clio?
RedactifyAI supports PDF, Word (DOCX and DOC), and image files (TIFF, PNG, JPG). Scanned PDFs work with the built-in OCR. No conversion needed before you import.
Can I see a record of what was redacted and when?
Yes. Every redaction is logged in the audit trail, including who performed it and what was removed. You can access the audit log from your RedactifyAI dashboard and export it for compliance records.
Audit log
Need more help?
If you ran into something this guide does not cover, reach out directly.